How to Secure Your Google Account

This is a follow-up article to my previous article What Information Does Google Collect About You?
Google’s platforms and services are among the most popular and used by a vast majority of users in the world. Millions of people around the world use Google’s free Gmail account. Have you gone through the account profile settings and ensured that your settings are configured to enhance your security and privacy? Most people don’t go through this exercise. In fact, unless you are really into technology, it’s not always easy to figure out the best configuration options for your particular situation.
As you will learn in this article, there are so many settings that people hardly ever visit and therefore don’t know what they are sharing with others and Google. That’s exactly why it’s important to secure your Google account. There’s just too much information and some of them is duplicated or out of order, which causes confusion.
In this article, I will offer guidance and walk you through the steps to configure your Google account with security and privacy in mind. Google offers some great services. It’s prudent to ensure your Google account is secure, so you can use their services with confidence and protect your privacy as much as possible.
| CAUTION! Because one size doesn’t fit all, the guidelines in this article may not be suitable for everyone. Customize my recommended settings to fit your own situation and environment. And as always, modify the settings at your own risk. |
Step #1
First, I recommend reading my previous article What Information Does Google Collect About You?, which is essentially Part I of this article. Without knowing what you are up against will make it difficult to understand how you need to secure your account. It will also help you see the bigger picture of why you are making certain changes. Besides other topics, I also discuss some of my privacy and security concerns in that article, which you will find useful.
Step #2
To secure your Google account, I don’t recommend going through Google’s privacy checkup. Simply follow my instructions because they are much more comprehensive. Depending on your configuration and how you use your Google account, you may see more options than I’ve listed in this article, or perhaps you may see fewer options. However, the information I’ve provided should be enough for you to configure some of the additional settings that may not be listed in this article on your own. If you have any questions, you can ask in the comments section at the end of the article.
Step-By-Step Instructions: Securing Your Google Account
Sign in to Google Account
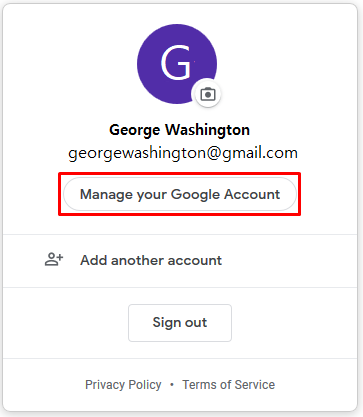
The first thing you need to do is sign in to your Google account (e.g. Gmail). Then click your profile icon in the upper right corner and select Manage your Google Account, as shown in the screenshot below.
| Best Practice: It’s important to secure your Google account and review all the settings at least a couple of times a year. |
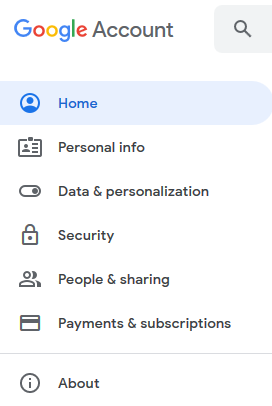
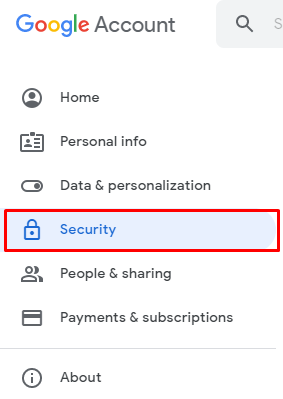
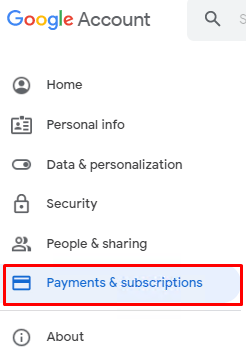
At the time I wrote this article, the Google account consisted of the following six categories. We are going to cover them all in the order they are listed.
- Home
- Personal Info
- Data & personalization
- Security
- People & sharing
- Payments & subscriptions
Personal Info
Go to Personal info. This section is broken down into three categories:
- Personal info
- Contact info
- Choose what others see
Let’s look at the Personal info category first.
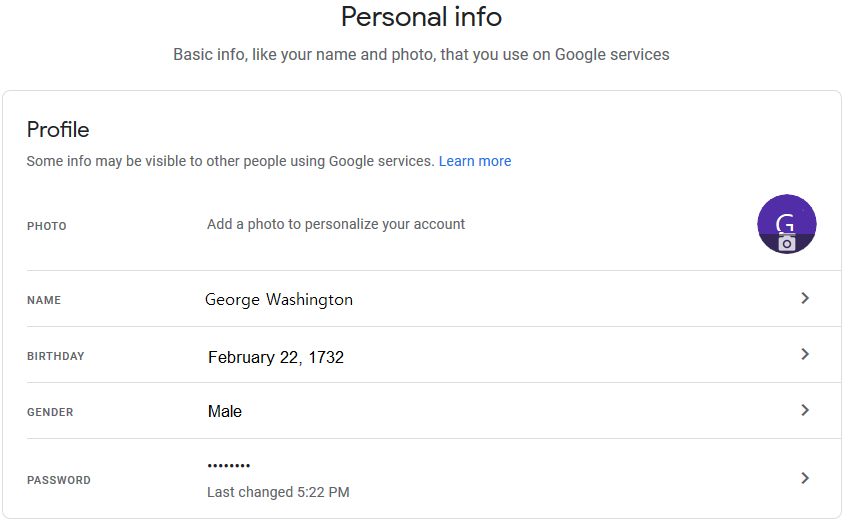
From security and privacy perspective, the only thing that you need to enter correctly in your Google profile is your name because it’s displayed in the email that you will send to others. I don’t see any good reason to enter the actual birthday or gender in the Personal info section, unless you’re the first president of the United States :). Companies, such as Facebook and Google, that collect your Personally Identifiable Information (PII) to potentially share with third-parties, don’t need to know about your PII. I recommend you leave the birthday entry blank, and for gender select Rather not say.
Contact info
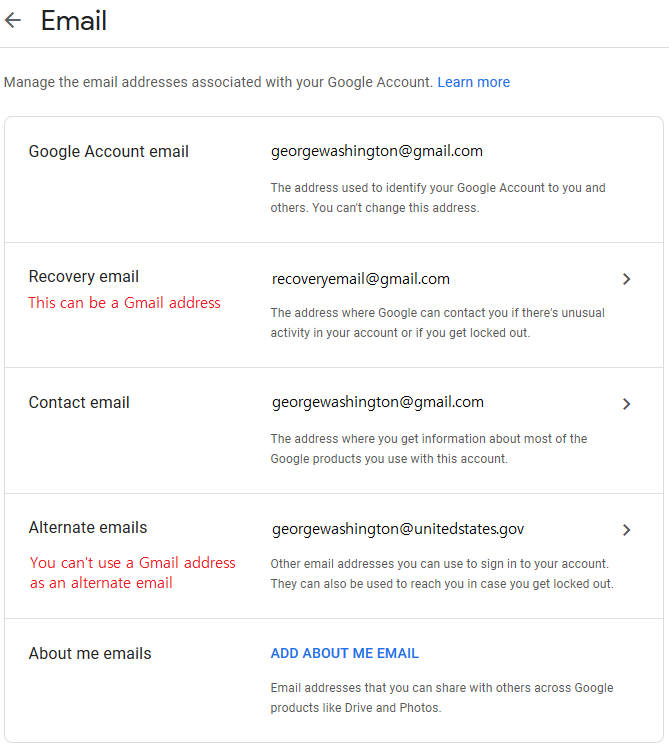
In the Contact info category select Email. I recommend you enter both a recovery email and an alternate email. These will serve as a backdoor, in case you are locked out of your account. The recovery email can be another Gmail account. However, the alternate email must be from a different domain. Alternate email can be used to sign in to the same account with a different email, but it can also be used to recover your account. Although it’s not as important as recovery email, it’s best to create an alternate email.
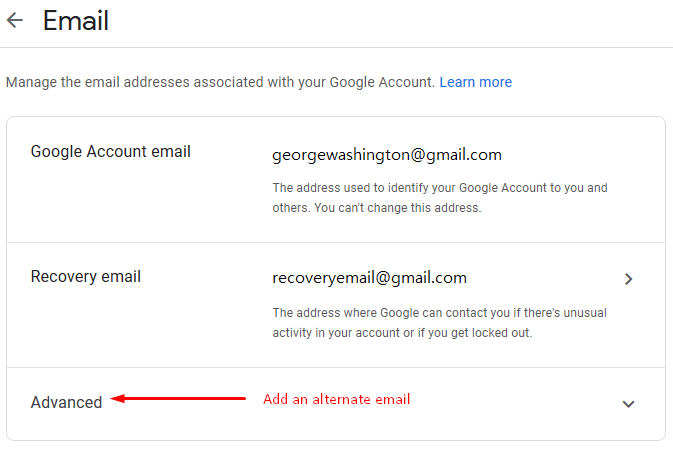
When you are done, your Google account email and contact email will be the same. Your recovery email can be your Gmail address, or an email address from a different domain. Your alternate address must be from a different domain. Do not add About Me email.
Phone
Under the Contact info category select Phone. Here you can enter your phone number, which will come handy for receiving security and other alerts from Google. It will also be another way for you to get back into your account if you get locked out. I recommend you use a Google Voice phone number here. Google Voice number is free for people living in the United States. Again, from security and privacy perspective you want to share the least amount of information in your Google account. If you are not familiar with Google Voice, check out my articles What is Google Voice and is it a Good Choice For You? and How to Obtain and Configure a Free Google Voice Number (in the U.S.). With Google Voice you can make free voice calls to U.S. and Canada. You can also send and receive text messages. This will allow you to keep your smartphone number private, but still make and receive calls and send and receive texts with other people without giving out your smartphone number.
Choose What Others See
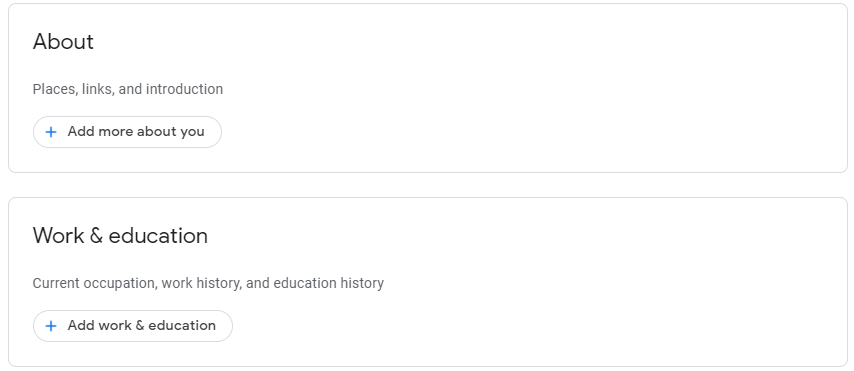
Skip the next category Choose what others see. Because you’ve not shared anything harmful at this point. There’s nothing you need to configure in this category. If you have configured your account in the past, you can click Go to About me link at the bottom of the Personal info page. In addition to Basic info and Contact info, you will find About and Work & education categories here. Clean up all the information that you have shared with Google. For example, get rid of your current occupation, work history, and education history.
You have now secured the information in the first section Personal info. Let’s move on to the next section.
Date & Personalization
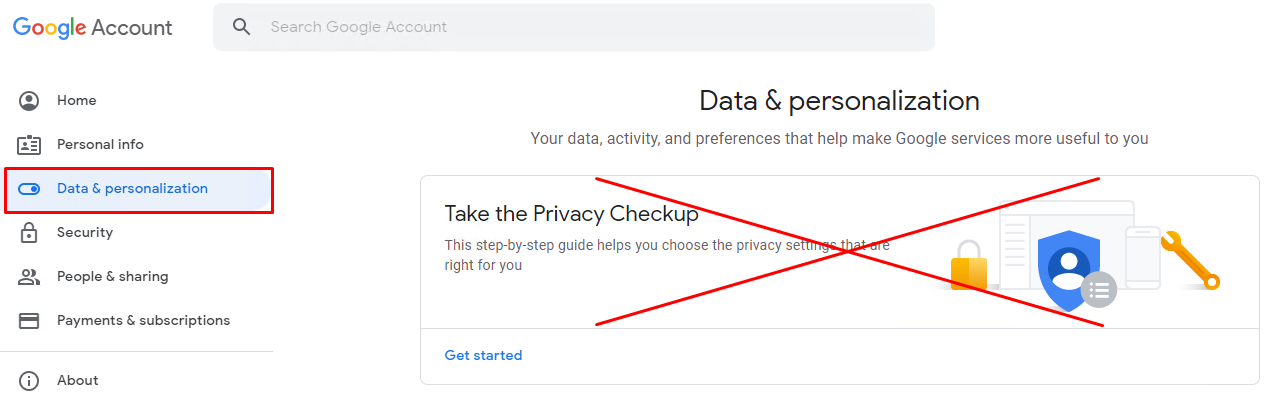
Go to the Data & personalization section.
The first section you will see is Take the Privacy Checkup. Simply skip this section. I will be walking you through all the steps that are necessary to configure your privacy in more detail than Google’s privacy checkup.
From privacy perspective, the next section called Activity controls is extremely important. Google keep tracks of your purchases, reservations, and subscriptions when you use Google Search, Maps, and your Assistant. Because by default Google also keeps track of your location, when you sign into your Google account (e.g. Gmail) and you make reservations, purchase things, and travel around the world, Google can keep track of the items you purchase, your flight reservations, how long you are away from home, what cities and countries you visit, the exact dates of your visit, etc. Google can literally know more about your travel activities than your spouse. You can actually see a map of all the places you have visited in Google map. Google knows about your location and other tracked activities when you use your account. If you don’t use any Google apps and services, such as Gmail, Google map, etc. or if you prevent Google from tracking you then Google would not know all the details of your activities.
At the time I am writing this article, there are at least six major categories in this section. This may change in the future. I am going to focus on the following main categories, but you may see others like Account storage and Reservations, which are self-explanatory.
- Web & App Activity
- Location History
- YouTube History
- Ads personalization
- Activity & timeline
- Things you create and do
Let’s walk through each one of these categories.
Web & App Activity
Click on the first category under Data & personalization called Web & App Activity.
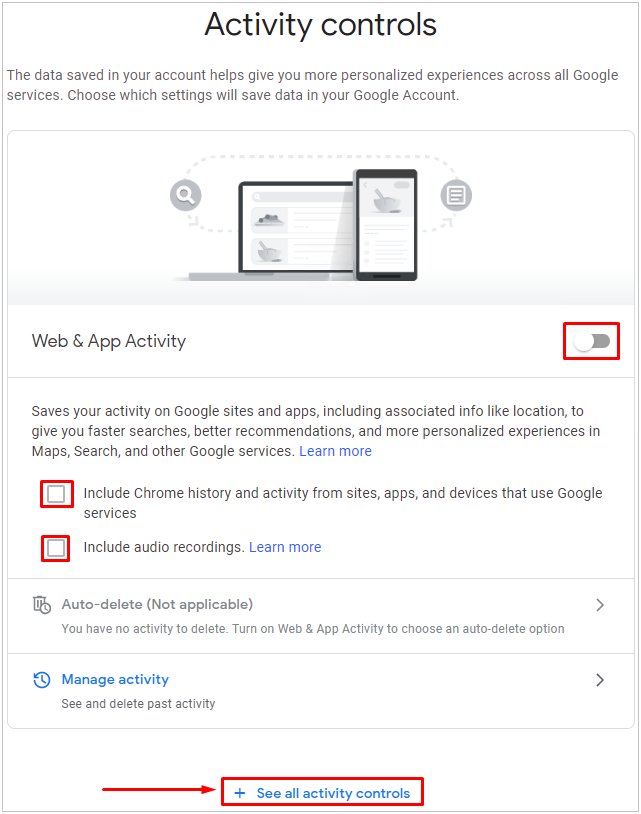
- Disable the Web & App Activity button so it turns from blue to gray.
- Make sure the box Include Chrome history and activity from sites, apps, and devices that use Google services and Include audio recordings are both clear (unchecked). Keep in mind that this setting doesn’t affect other Google services, or audio saved on your device. For example, Google Voice and YouTube manage the audio in their own services. If you have saved audio in the past, you can listen to your audio at activity.google.com and download your audio at takeout.google.com.
- If you need additional information on the topics, click the Learn more link.
Important: If you want to get rid of your previous activities, now will be a good time to click Manage activity. Here you can delete your activity manually, or you can delete your activity automatically.
| When Does Google Delete Your Activity? When you delete your activity, e.g. location data, Google removes it from your screen but behind the scene, Google usually takes up to 2 months from the time of deletion to wipe out your data. Because this often includes up to a month-long recovery period, it can take up to 3 months to wipe out your data. Google also says that sometimes it may keep your data for up to 6 months. So, Google says it may keep your data at least up to 6 months on its servers. |
Click the link See all activity controls. This will allows us to take action on multiple items on one page.
Location History
Go to the Location History. and turn it off. There is no need to share this information with Google. Which dentist, psychiatrist, clinic, hotel, or hair salon you go should be your business. When you use Google services at one of these places Google saves that information on its server. Yes, it will be easier for you to automatically see the local restaurants, pizza shops, etc. when you do a Google search, but you can do that anyway by typing Chicago restaurants, or Chicago pizza in the search when you are in Chicago.
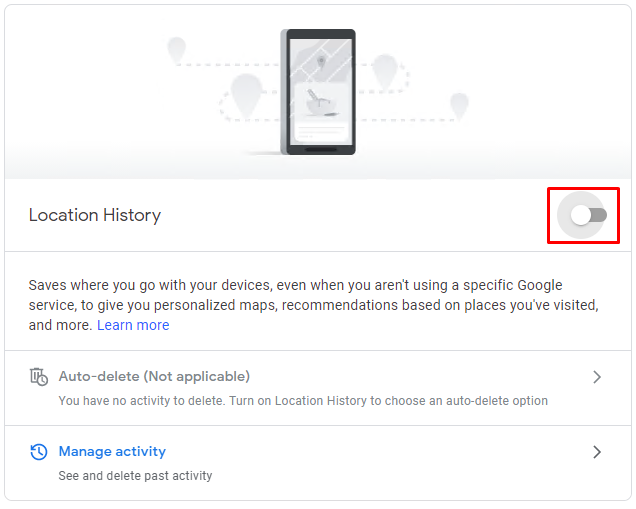
Just like the previous section, you can manage your activity and delete your location history manually or automatically. If you need additional information on the topics, click the Learn more link.
YouTube History
Go to YouTube History and turn it off.
When you turn off YouTube History, the two boxes Include the YouTube videos you watch and Include your searches on YouTube should be automatically cleared. If not, manually clear them.
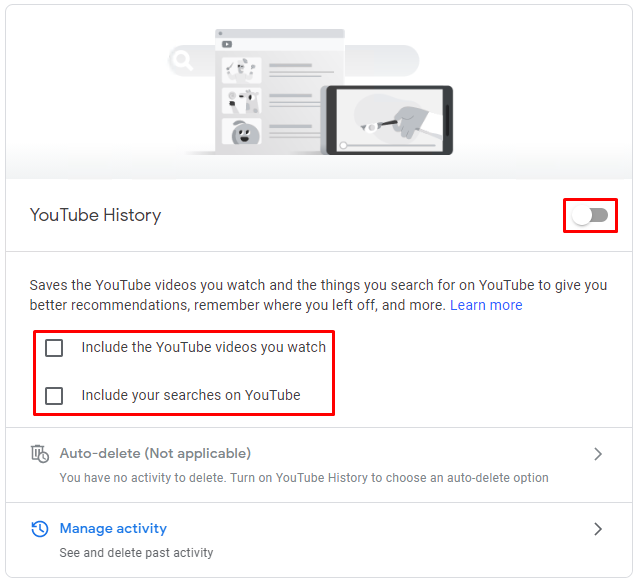
Just like the previous section, you can manage your activity and delete your YouTube history manually or automatically. If you need additional information on the topic, click the Learn more link.
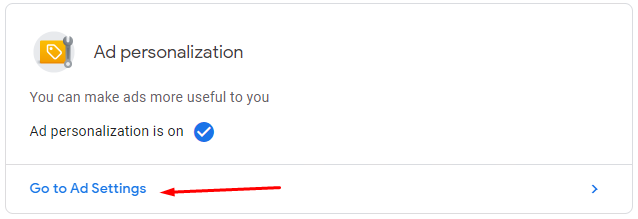
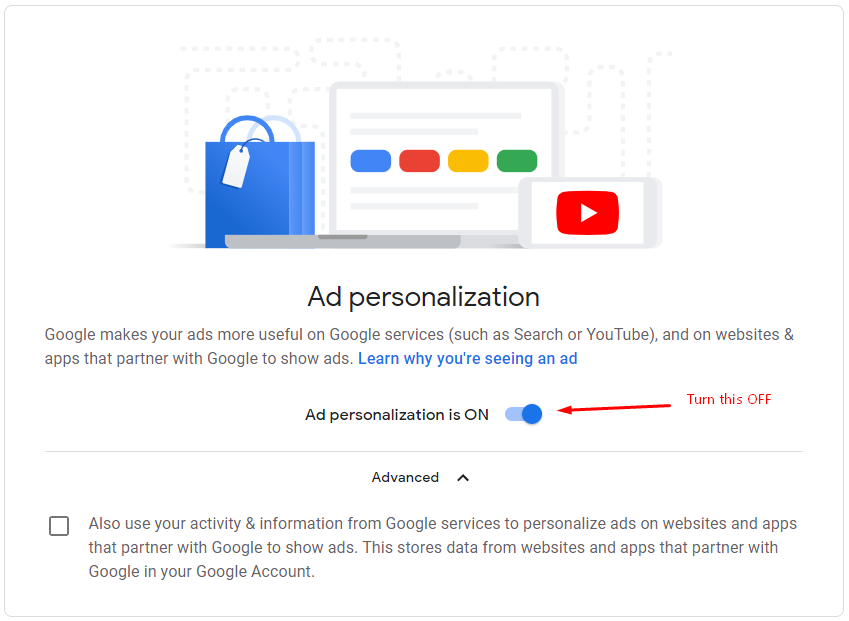
Ad Personalization
Go to the Ad personalization and select Go to Ad Settings and turn off ad personalization. When you turn off add personalization, you’ll still see ads and you’ll no longer be able to turn off ads from specific advertisers. I recommend you still turn off the ads to protect your privacy. When you click on ads, Google keeps track of your interests, purchases, and shopping habits. If you turn the ad personalization off, you will stop sharing this data with Google, which is what you want.
Before you turn off the Ad personalization, I would like you to first click the down arrow next to Advanced. Google has added a hidden clause that you are not able to see without selecting the down arrow.
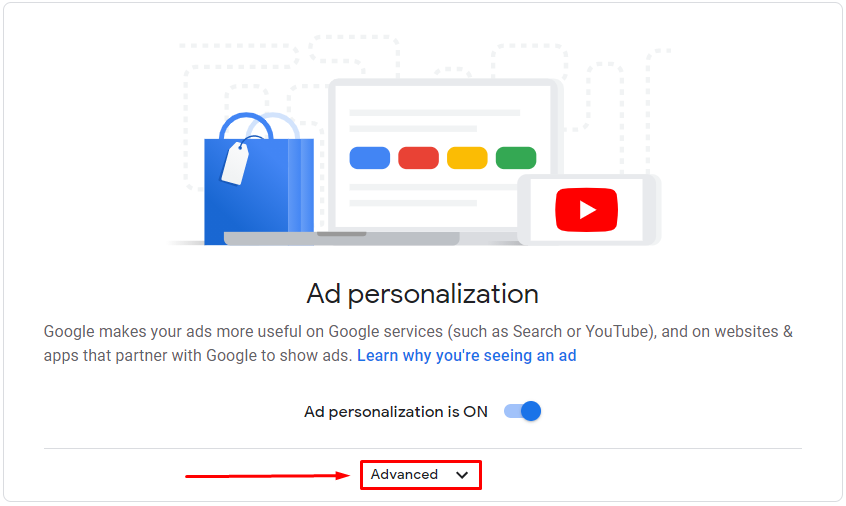
Just so you know, there’s nothing advanced in this area. It seems like Google didn’t want people to easily find this clause so they decided to hide it under this so-called advanced section. That’s just my personal opinion. When you expand the Advanced section, you will see the following statement.
Also use your activity & information from Google services to personalize ads on websites and apps that partner with Google to show ads. This stores data from website and apps that partner with Google in your Google Account.
The statement that you agreed to, by default, essentially states that in addition to other things, you’re allowing Google to store your browsing data from third-party websites and apps that partner with Google.

Clear the box in the Advanced section. You’ll see a popup box that tells you what will happen if you clear the check box. Google won’t store your future browsing data from websites and apps that partner with Google. Woohoo! That’s great. That’s exactly what you want, so click Exclude.
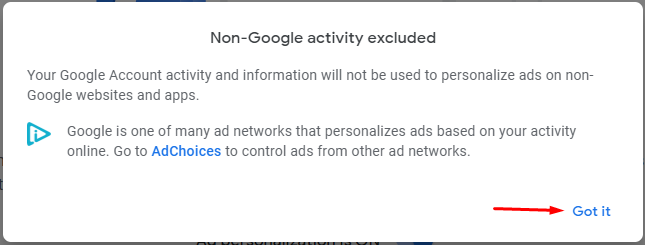
Click Got-it.
You could also select AdChoices to control ads from other ad networks, but I won’t go into that in this article. You’ve disabled personalization of ads. You will still see ads from Google and third-party vendors, which is fine. Google will no longer capture your activities from not only Google websites and apps, but also from all third-party websites and apps that partner with Google. That’s the best you can do at this point.
Now that you’ve turned off the option in the Advanced section, you are ready to turn of the Ad personalization. Click the blue button to turn it off. Good job!
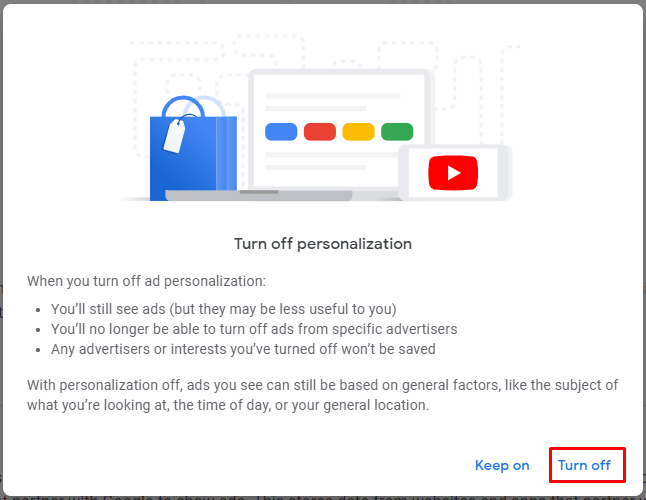
You thought you just turned off ad personalization but unfortunately, you’re wrong. You’ll see yet another popup window. Google won’t let you turn off ad personalization that easily. You have to click Turn off again. Sorry about that.
After you turn off the ads second time, you will see yet another pop-up window. Seriously? You’re not quite finished yet. You need to click one more time. Go ahead and click Got it.
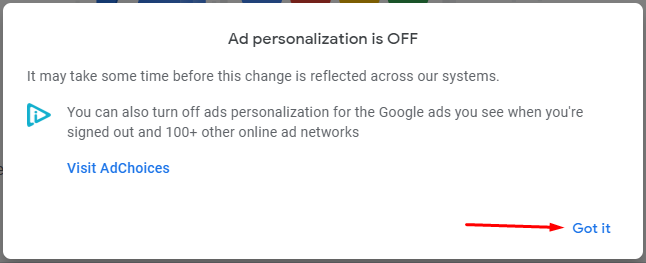
Whew! Finally, the ad personalization is turned off. Right? Wrong again. Not quite yet. The actual process can take some time before the change is reflected across all the Google systems. The good news is that your part is done. You don’t need to do anything else it this time.
| Surprise! Before you proceed, read the text in the middle of the above screenshot. It says, “You can also turn off ads personalization for the Google ads you see when you’re signed out.” Wait a minute, Google keeps track of your activities and captures your data even when you’re signed out of Google services and apps? Isn’t that’s exactly why Facebook had a class action lawsuit against it and got fined for keeping track of users’ activities after they signed out of Facebook? And then Facebook cheated again and had another class action lawsuit and got fined once again? When I am signed out of Google apps and services, I don’t expect Google to keep personalizing (code for keep capturing data) my ads. Nor should any of Google’s partner be personalizing my ads once I am signed out.
Perhaps I am misreading this. What do you think? Please let me know in the comments section below how you read this. As I stated earlier, you can click Visit AdChoices to customize ads from online ad networks. That’s a topic that I may consider discussing in another article at a later time. |
Activity & timeline
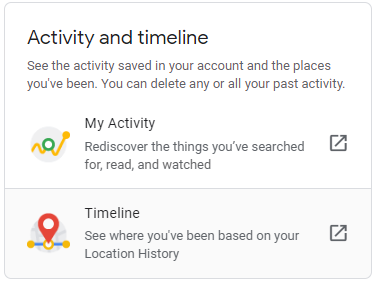
First, right-click My Activity and select Open link in new tab. This will allow you to simply close the new tab when you are done to quickly get back to where you need to be. Here you will see all the things you’ve searched for, read, and watched. You can clean things up as necessary. Once you’ve secured your account, this area should be clean as a whistle.
Next, right-click timeline and select Open link in new tab. Your timeline information is collected if your Location History is enabled. For privacy reasons, delete all your location history, if there’s any.
Although Location History is turned off by default, it’s pretty easy to enable it without knowing the consequences. For example, when people use their mobile device, a Google service might tell them they need location history to complete the task and they say “okay.” That’s how simple it is to enable Location History without realizing what just happened. It’s not much different than people installing apps on their mobile devices without thinking twice about the permissions they just gave to the app, or what the implications might be. That’s exactly why I wrote the article Why Can Apps Be So Dangerous?
Cybercriminals who hack into your Google account can find out way more about your whereabouts than you realize. If you are sharing location history with your sister, then if a cybercriminal can access your sister’s Google account, he/she will also have access to both her and your timeline. The law enforcement also uses this feature and have the ability to use the timeline data in a court of law against a criminal. They can access location data with a court warrant going back several years. Yes, some criminals are dumb enough to carry their Androids to a bank robbery, which helps police place them at the scene of the crime at the exact time of the robbery.
Google keeps track of your whereabouts using a combination of geofence management system and other services that might be available in the area. For Digital Forensic Investigators like me, this type of data can be a gold mine for building a case.
Did you know that Google timeline, which is based on your Location History, has the ability to tell exactly where you were at 8:00 AM on January 15, what time you went to the Bank of America in downtown, whether you took a train or a bus to get there, what time you arrived at work, what time you ate lunch at Chipotle restaurant, at which Starbucks you stopped to get coffee, and at what time you got back home in the evening? There’s so much to talk about this service. I just may have to write a separate article on this topic.
Here’s a sample of what Location History looks like. This was posted on trendblog.net by Marc Knoll.
Click on the GIF below to see the type of data Google collects about you.

To protect your privacy, follow these steps to delete your Location History.
- Sign in with the Google account that you want to secure.
- Go to your timeline and delete your location history, as explained above in this section.
- If you use a different account on your mobile device, go to https://www.google.com/maps. Select the Menu (three horizontal bars in the top left corner).
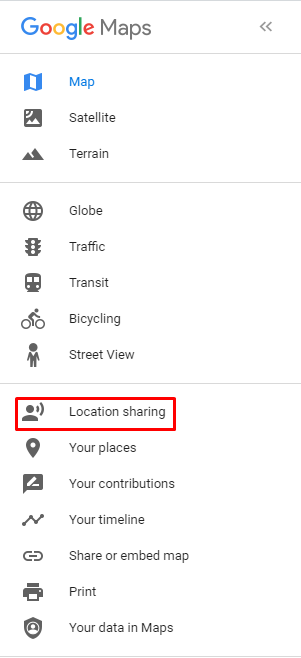
First, go to Your timeline (fourth from the bottom) and see what information Google may already have stored about you.
Then go to Location sharing -> Manage your location and delete your history. - On an Android smartphone, go to Settings -> Location and turn off the location sharing. When you turn off location sharing, Google won’t capture your new data, but it keeps your old data in storage. You need to delete the old data. You will notice two Google location settings here.
a) Google Location History
b) Google Location Sharing
Go to each one and make sure you turn them off.On an iOS device, follow these instructions from Google to turn off Location Sharing. Do not use the feature Automatically delete your Location History because it doesn’t allow you to completely delete your history. You can only delete history that’s older than 3 months or 18 months. In other words, Google will keep at least 3 months of your Location History at all times, if you use this feature.
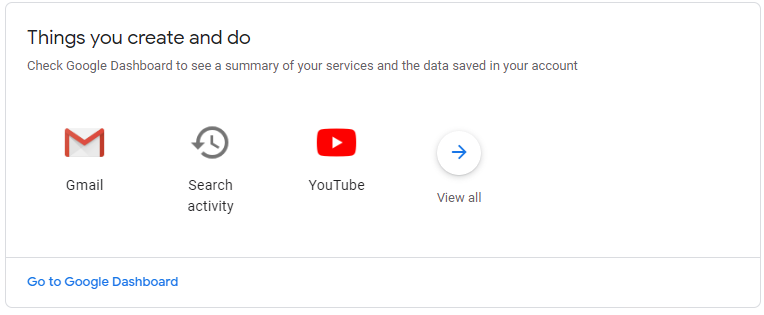
Things you create and do
Under Things you create and do, click Go to Google Dashboard. You can also go to this location directly when you are signed in to your Google account by going to https://myaccount.google.com/u/0/dashboard.
Here you can see and mange your Google account data. You can also Download your data.
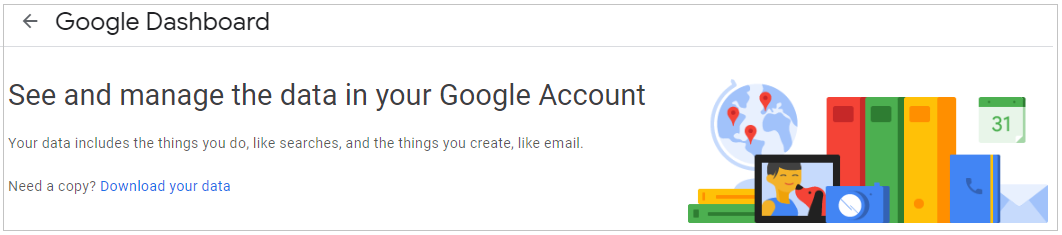
Clicking on Download your data will take you to Google Takeout. Go ahead and export your data. This is a good lesson in understanding the vast amount of personal data that you’ve allowed Google to keep.
It’s time to move on to the next section. Click Go to your Google Account at the bottom of the Activities control page.
Security
Go to the Security section.
In this section, there are seven categories.
- Security issues found
- Signing in to Google
- Ways we can verify it’s you
- Recent security activity
- Your devices
- Less secure app access
- Signing in to other sites
Let’s walk through each of these categories.
Security issues found
Go to Security issues found category. The yellow circle with an exclamation mark means there are some warnings in this section that need to be addressed.
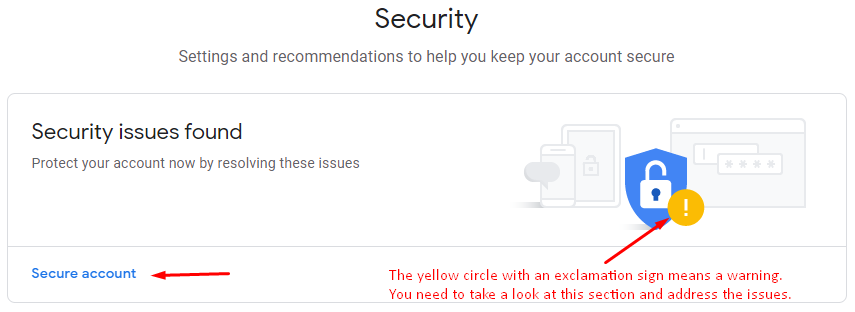
Click the Secure account link. You will see the following Security Checkup options.

The Sign-in & recovery gives you the option to confirm your recovery email and recovery phone.
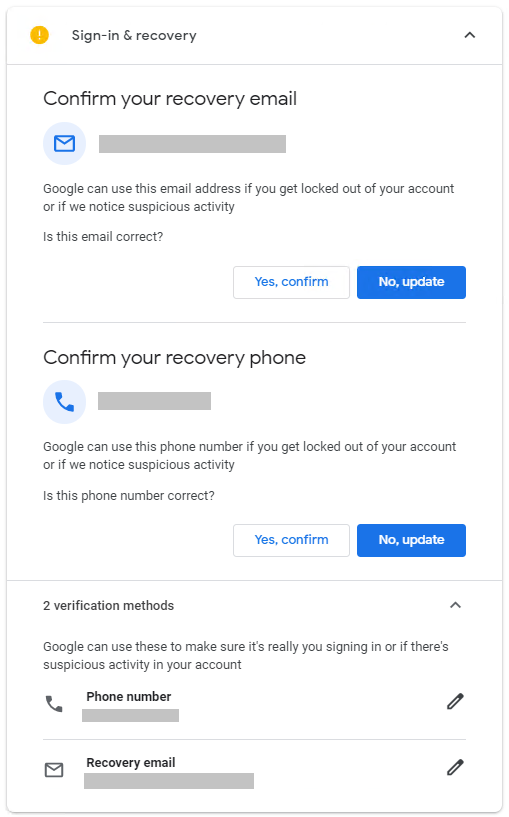
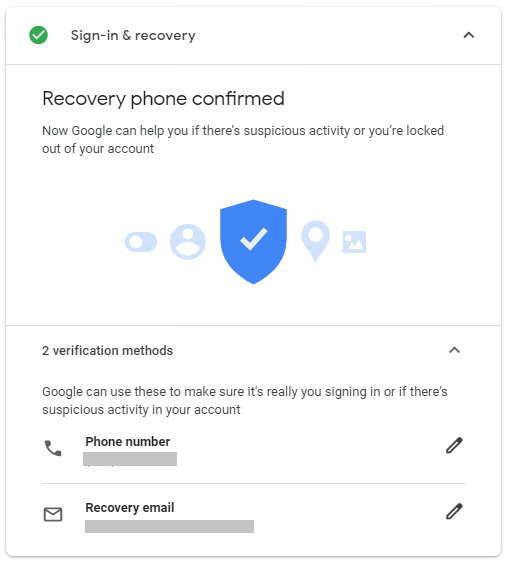
These recovery options are used in case you are locked out of your account, or if Google notices suspicious activity. Even if you have already entered this information in the past, Google may occasionally display a security warning and ask you to confirm your recovery email and phone number. I know it’s a nuisance to keep answering these questions when you know your recovery information is up to date. You can either click Yes, confirm box to get rid of the warning sign (yellow circle with white exclamation mark), or if you don’t see anything wrong here. just ignore this fake warning. If you confirm both the email and phone recovery entries, the warning sign would disappear.
Now we need to resolve one more security issue. It’s the third-party access.
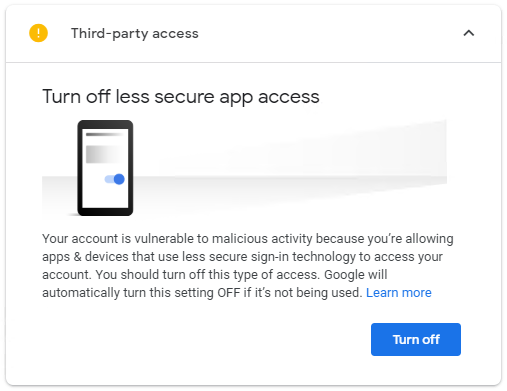
This issue is not very common. I just wanted to point out under what scenario you are most likely to see this warning. If you are using POP3 email to access your Gmail account, you will see this warning. For example, if you are using Microsoft Outlook desktop app to access your Gmail account, you will need to enable POP3 in Settings -> See all settings -> Forwarding and POP/IMAP tab. Then you will turn on less secure app access, which I will show you a bit later in this article.
Because POP3 is not considered very secure, Google is asking you to turn it off. If you know what you are doing, or it’s something that you must need to use and know how to secure your account then you can ignore this warning.
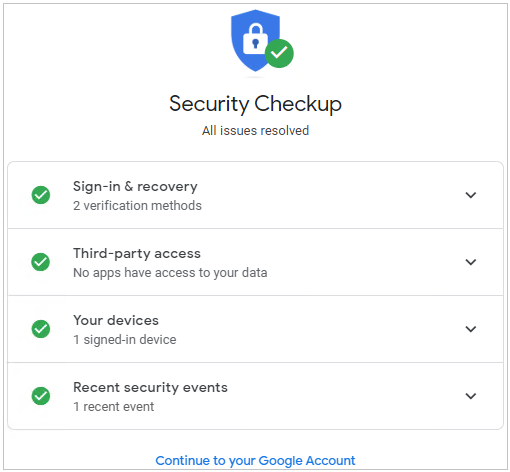
Now all security issues are resolved. Click the blue hyperlink Continue to your Google Account.
Signing in to Google
In this section you can add additional layers of security by using your phone or 2-step verification.
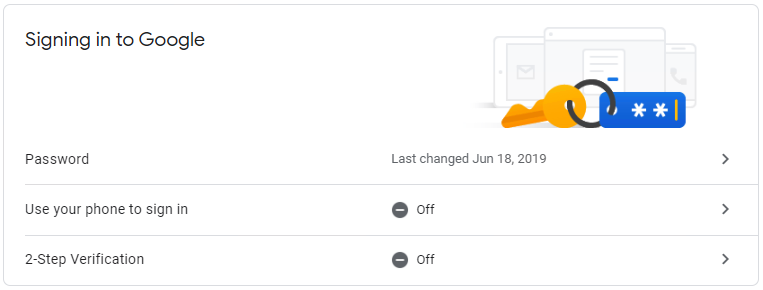
I recommend using the 2-step verification. It’s not very difficult to set up and makes hacking into your account extremely difficult. This is the preferred method recommended by ethical hackers and other security professionals.
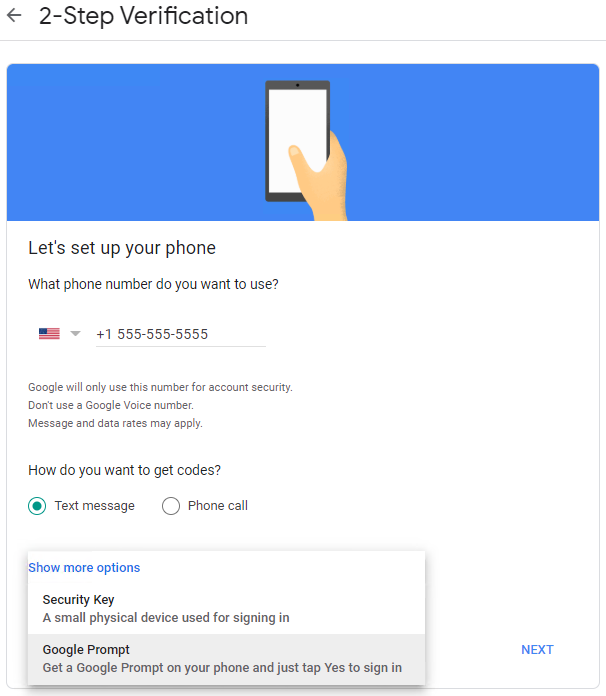
| Best Practice: Set up a complex password of 100 characters for your Gmail with uppercase, lowercase, numbers, and special characters. Save the password in your password manager, so you don’t have to memorize it. Now when you add the 2-step verification, the attacker would not only have to figure out your 100-character complex password, but also require access to your smartphone to enter the security code. Your password manager can enter the password for you automatically. All you have to do is enter the code from your smartphone to access your Gmail. |
For the security code, you can either receive a text message, a phone call, or you can use the two additional options under Show more options: Security Key, Google Prompt. You may find either the text message or the Google Prompt option as the most convenience.
Ways we can verify it’s you
If you have already configured a recovery phone and a recovery email, you can skip this section. Otherwise, for security reasons I encourage you to do that now.

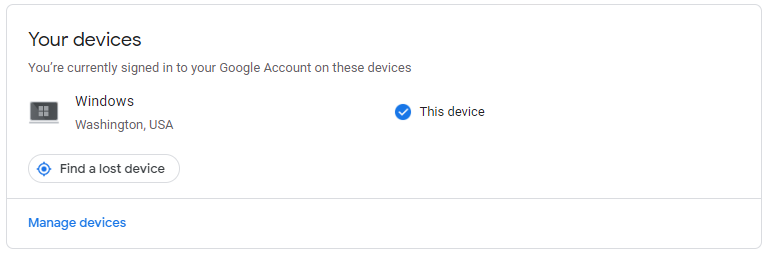
Your devices
This section shows you where you’re currently signed in to your account. You can click Manage devices and make sure that you recognize the devices that were used to access your Google account. If not, change your password right away.
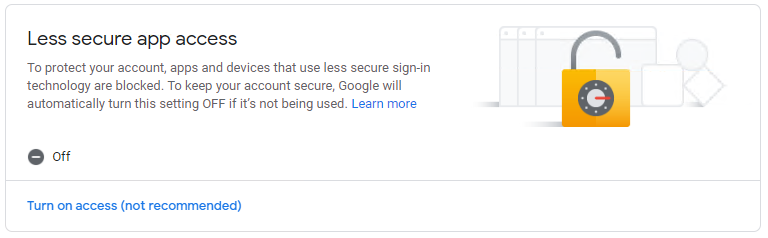
Less secure app access
For most people, this setting would be off. As I pointed out earlier, if you want to use POP3 to access your Gmail account (e.g. in Outlook desktop client or another messaging software), you have to turn on less secure app access.
NOTE: When you turn less secure access either on or off, the page doesn’t refresh. You have to manually refresh the page. It’s a good idea to always verify this setting by refreshing the page (press F5) after you make a change.
Signing in to other sites
Most people do not need to touch this section. I mentioned using the password manager. DO NOT use the password manager listed here. Use a third-party free password manager. See the links in the Additional Reading section at the end of this article for more information.

People & sharing

In this section, I recommend turning off the settings Contact info saved from interactions.
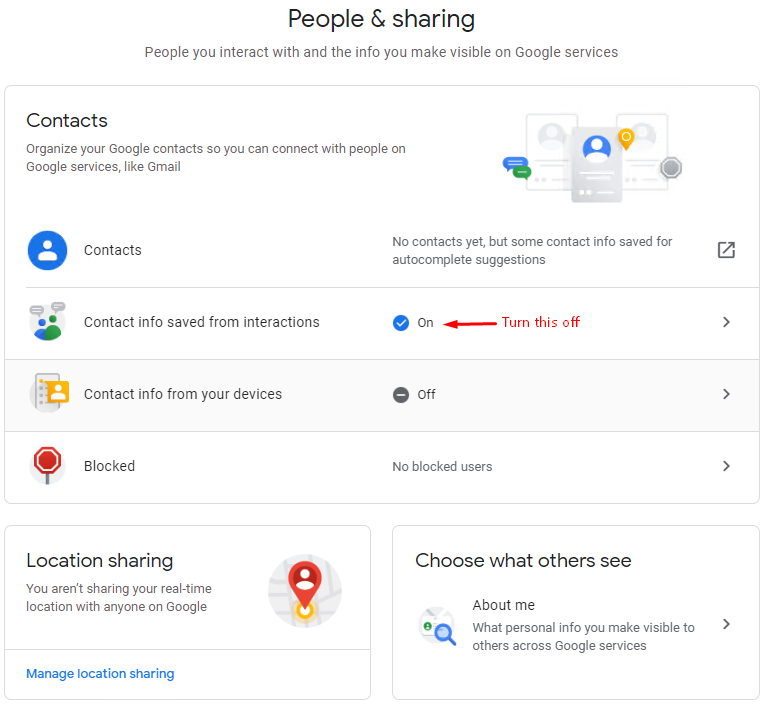
The more contacts you add here, the more data you are sharing with Google. When it comes to sharing: Less is More. The less you share, the more you will strengthen your security and privacy, so turn off this setting.

You should have already disabled location sharing if you are following my steps, so you shouldn’t have to do anything in that section. The Choose what others see category is where you can see what personal information about you is shared with others across Google services. Less is More! Share as little as possible about you in this section as follows.
Basic:
Name: It’s okay to have your full name here
Profile Picture: Don’t add your picture
Gender: Don’t provide your gender
Birthday: Don’t share your birthday
Contact info:
Google Account Email: This should already be added and is necessary
About:
Leave it blank
Work & education:
Leave it blank
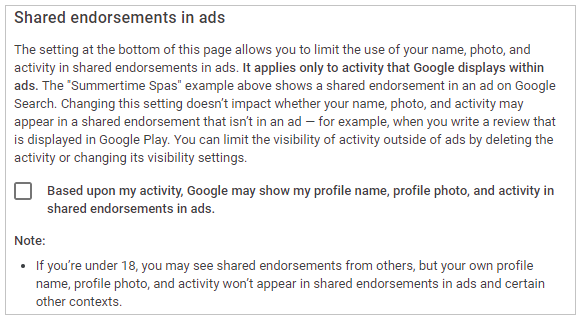
Share recommendations in Ads
This section should be off.
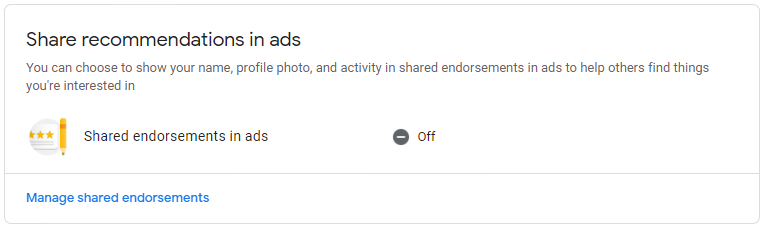
Click Manage shared endorsements and clear the box Based upon my activity, Google may show my profile name, profile photo, and activity in shared endorsements in ads. Did you know that you have been sharing your name, photo, and activity in shared endorsements ads? Probably you didn’t.
Payments & subscriptions
Go to the Payments & subscriptions section.
Visit each category (e.g. Payment methods) and see what information is shared with Google. In most cases, there should be nothing about you in any of these categories.
| NOTE: Google may make some changes over time to the account settings and interface for various reasons, so your screen may not match the screenshots in this article at that point. I will try to update this article in the future after significant changes, but if you have any questions you can ask them in the comments section at the end of the article. |
Activity in Other Google Apps and Services
Even after you customize all these settings, you are only configuring your Google account settings. If you want to secure settings in other apps, you will have to visit them individually. You can go to Maps, Search and other apps that you use and configure the privacy and security settings in those apps.
Next Step
Google’s platforms and services are among the most popular and used by a vast majority of users in the world. If you followed the steps in this article, you know what type of information Google collects about you. You have also secured your Google account following my guidelines. The next step would be to secure your Google Chrome browser. Check out my article Securing Google Chrome Browser for step-by-step instructions on how to configure Google Chrome.
Additional Reading
- What is Google Voice and is it a Good Choice For You?
- How to Obtain and Configure a Free Google Voice Number (in the U.S.)
- Selecting A Password Manager
- The Advantages of Using a Password Manager
- Selecting an Authenticator App
- How to Prevent Browsers from Sending Your Location Data to Web Sites
- How to Secure Google Chrome Browser
- Best Practices for Configuring Windows 10 Location Access
| Thanks for reading my article. If you are interested in IT consulting & training services, please reach out to me. Visit ZubairAlexander.com for information on my professional background. |
Copyright © 2020 SeattlePro Enterprises, LLC. All rights reserved.

