How to Obtain and Configure a Free Google Voice Number (in the U.S.)
In my previous article What is Google Voice and is it a Good Choice For You?, I explained what Google Voice was and listed several pros and cons of using Google Voice. If you decide to try out Google Voice, this article will walk you through step-by-step instructions for obtaining and configuring Google Voice on your desktop or mobile device.
Although you can configure and use Google Voice on your smartphone, in this article I will demonstrate how to setup Google Voice on your desktop computer. Even if you want to setup a Gmail account with Google Voice on your smartphone, I recommend you first login and setup Google Voice in your Gmail account on your desktop computer and once it is set up, just install the Google Voice app on your smartphone and you will be all set to use it with your Gmail account on your smartphone.
| NOTE: Some or all the screen options in this article may look different in the future, if/when Google makes changes to the Google Voice. |
- On your desktop computer, login to the Gmail account that will be associated with the new Google Voice number. This may be an account that is used on the desktop or on the smartphone.
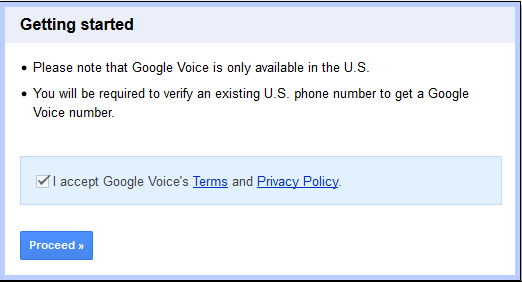
- Open a new tab and go to Google Voice Sign Up page. Read and accept the Google Voice Terms and Privacy Policy, then click Proceed.
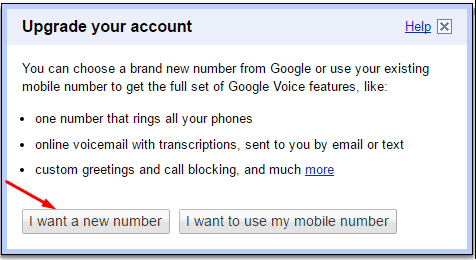
- Select I want a new number, or select I want to use my mobile number. In this example, I will assume you want a new number, so make that selection.
WARNING! I don’t recommend replacing your mobile or landline number with Google Voice for all the reasons I’ve listed in this article.
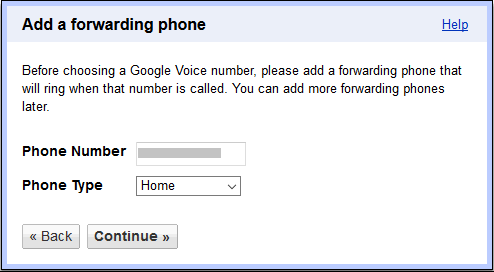
- You will have to provide a forwarding number. Google forces you to add a forwarding number even if you never forward your Google Voice to the forwarding number. In fact, you can use the same forwarding number for multiple Google Voice numbers. Enter a forwarding number and click Continue. The number can be a landline or a smartphone number. The phone type is only for your reference.
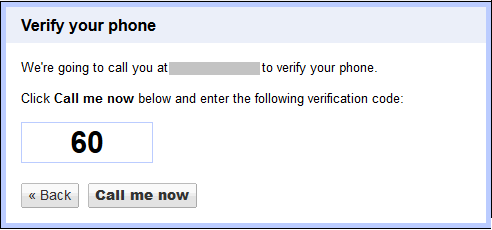
- Verify your phone by clicking Call me now. You will be asked to provide the two digit number listed on this screen, e.g. 60. As soon as you enter the correct code you will be taken to the next screen where you can search for your new Google number.
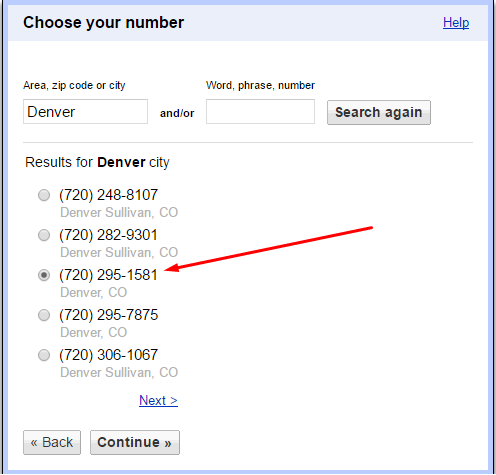
- In the search box, select an area code or type the name of a city, e.g. Denver.
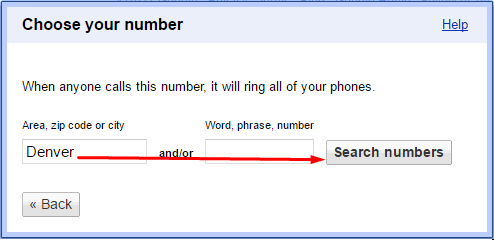
- Select a number from the list of available numbers. Some cities won’t have any available numbers so you may have to use a number from another city that’s close to the city you want, or just select an area code from a different state and then click Continue.
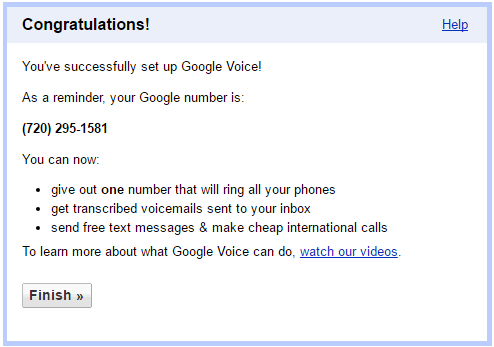
- You will see the Congratulations screen to indicate you have successfully setup your Google Voice. Click Finish.
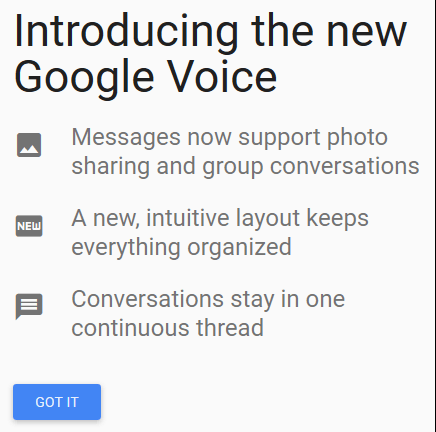
- Click Got It on the next marketing screen from Google so you can move on to the next step.
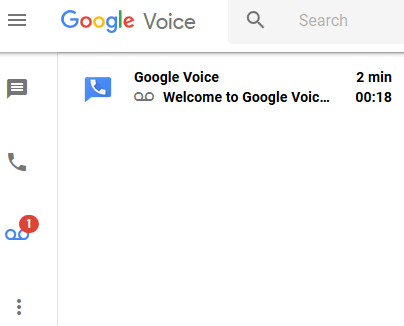
- You will be taken to the new Google Voice screen. Here you will see an 18 second voicemail message from Google to welcome you. Click the voicemail icon, with a round red circle next to it, to play the voicemail message from Google Voice or simply read the transcript.
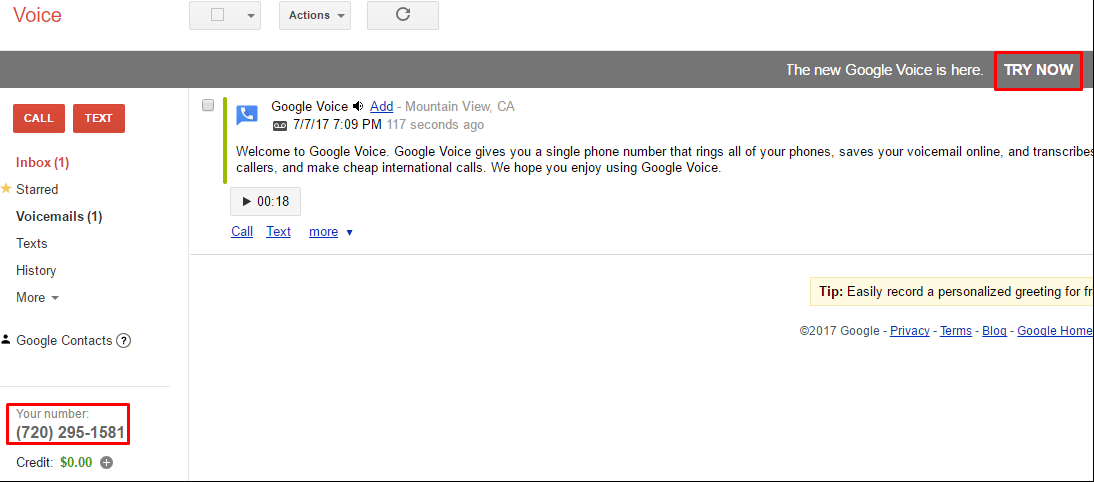
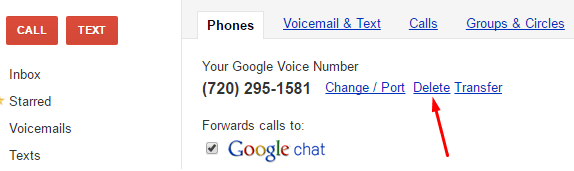
- Click the link Try Now to switch to the new Google Voice. I would imagine that at some point Google will remove the Google Legacy Voice page, but at the time I wrote this article the option was available. Notice the assigned Google phone number in the lower left-hand area of the screen.
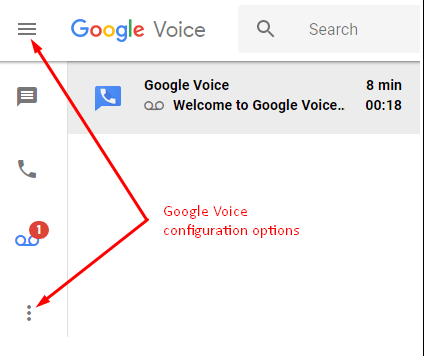
- You can access the Google Voice options by using either the three horizontal bars or the three vertical dots. Just so you know, the three horizontal bars are called the Main menu and the three vertical dots indicate that there’s More content available. Both of them take you to the same screen that has the Google Voice mail configuration options.
- You can switch between the new Google Voice and the Legacy Google Voice whenever you want. To go to Legacy Google Voice, simply click the main menu and then select Legacy Google Voice.
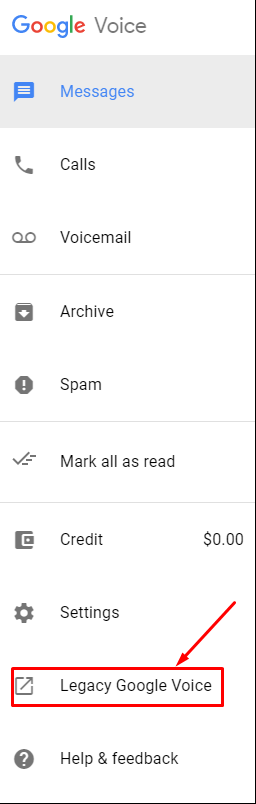
STOP! At this point you are done setting up Google Voice and understand some of the features. For most people, there is no need to follow the rest of the steps in this article. I am only documenting these advanced features for those who may wish to take advantage of them. - From the main menu you can click Settings and then manage several options, including your phone numbers, messages, calls, and voicemail. Under the Phone numbers option you can CHANGE your phone number, TRANSFER it or simply DELETE it if you don’t want it linked to this account anymore. In the next several steps I will walk you through these options to Change, Transfer and Delete a Google Voice number.
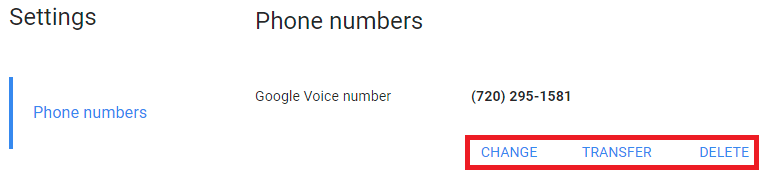
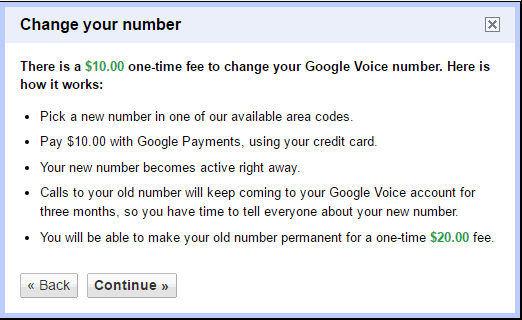
- If you click Change, you will be taken to the Legacy Google Voice page. Here you will click Change/Port. You will have to pay a $10 one-time fee to Google to change your number. For a one-time $20 fee you can make your old number permanent.
- The option to Transfer is fairly intuitive. You can transfer a Google Voice number from one account to another as long as the destination account doesn’t already have a Google Voice number assigned to it. If it does, the option to transfer will be disabled. As soon as you delete (or transfer the number to another account) the option transfer will be available in the Select a destination account to continue section with a radio button as follows.

- Click Sign-in to another account and login to the destination Google account where the phone number will be transferred.
- Click Transfer to complete the transfer between two Google accounts.
- You will be prompted to verify the U.S. forwarding phone. Click the blue underlined link here.
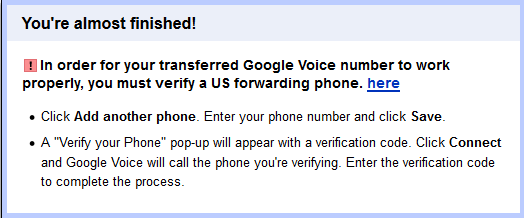
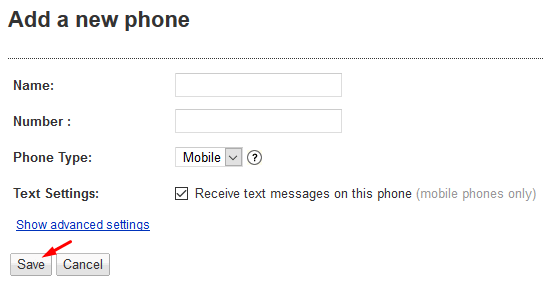
- As the above screen indicates, you need to click Add another phone. Keep in mind you are now in your destination account which will receive the phone number. That’s where the Add another phone option is available.
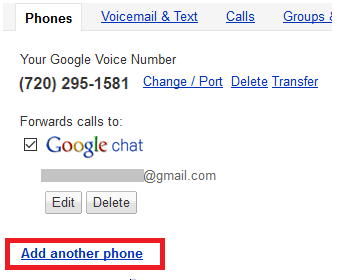
- Add the phone number in the Number box and then click Save.
- Google Voice will call your phone and prompt you to enter the code displayed on the screen. Click Connect. When prompted enter the two digit code, e.g. 03.
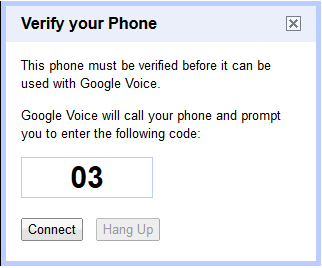
- Click Hang up. Your phone number has been transferred to the destination Google account.
- The third option for the phone numbers is to delete them. Because I added this phone number for the purpose of writing this article and don’t really plan to use it, I will Delete it so someone else can use this number.
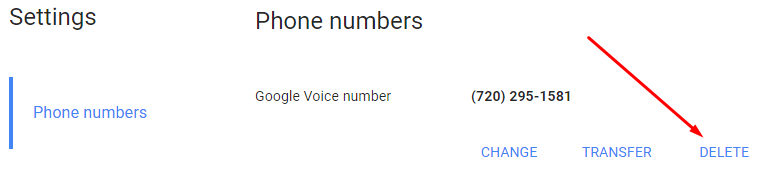
- This will take me back to the Legacy Google Voice page where I will click Delete once again.
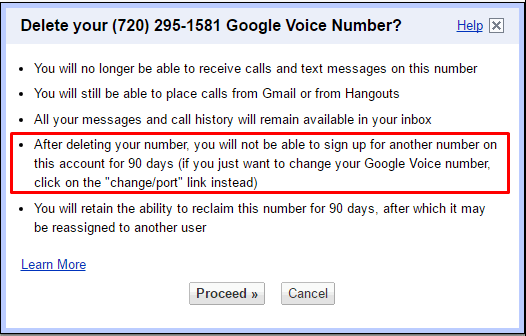
- Read the note carefully. You will notice that once you delete the number you can’t get another number from Google for this account for 90 days. Therefore, if you want a different number you should choose Transfer, rather than deleting it. Also notice that you can reclaim this number within 90 days, after which it may be assigned to another user. After reading the information on the screen, click Proceed to confirm that you want to delete this number.
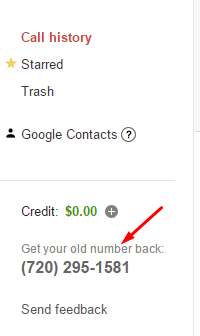
- Once the number is deleted you will see an option to Get your old number back. If you don’t reclaim it within 90 days, it may be reassigned to another user.
| Thanks for reading my article. If you are interested in IT training & consulting services, please reach out to me. Visit ZubairAlexander.com for information on my professional background. |
Copyright © 2017 SeattlePro Enterprises, LLC. All rights reserved.

