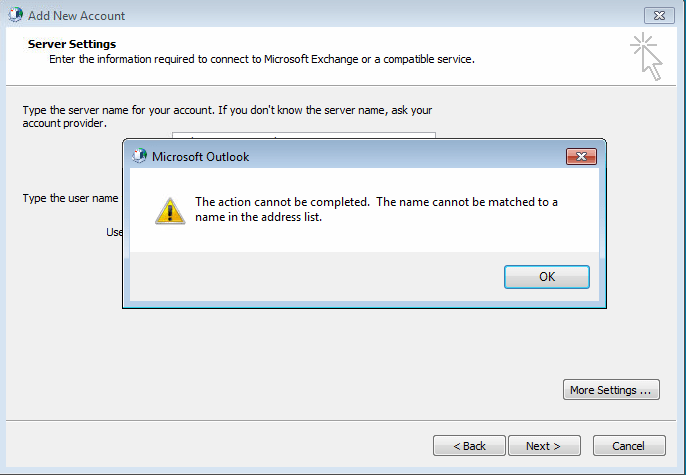
How to Fix the Error: The action cannot be completed. The name cannot be matched to a name in the address list.”

You may receive the following error message when you try to setup a new Exchange mailbox for a user. In my scenario, I was setting up a new Outlook Anywhere profile in Outlook 2010 on a Windows 7 computer for a remote user. The mailbox was created on an Exchange Server 2013 running on Windows Server 2012 R2. I have added this “test” user account many times on the same computer during my testing in the past but obviously there was something wrong with the account.
The action cannot be completed. The name cannot be matched to a name in the address list.
What Causes This Error?
There are several reasons that you may experience this error. If you use the Microsoft Exchange Analyzer tool then you may see the error “The name could not be matched to a name in the address list.” According to Microsoft “This issue typically occurs when the user account is not associated with a mailbox or when it has been manually configured to be hidden from the Global Address List. Lack of Active Directory permissions to certain objects or issues with the Exchange Recipient Update Service are also common causes. In addition to the error above, end users may be unable to successfully perform a check name, create a MAPI profile, or connect to an Exchange server.”
In my case, the user account was hidden because I use it for testing.
SOLUTION #1
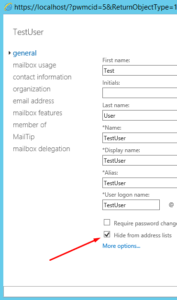
This solution only applies to you if your user’s mailbox is hidden from other Exchange users.
- Go to Exchange Admin Center -> Recipients -> Mailboxes and locate the user.
- Double-click the user account and clear the box Hide from address lists.
- Create the user profile in Outlook and after you are able to successfully login as the user go back in Exchange and hide the user account. The account should now function normally. Use the same trick if you need to add this user account at a different location in future.

SOLUTION #2
The first thing to do is to ensure that the user’s mailbox exists. In my case, I was already using this “test” user account on another computer and of course I verified that the account existed and matched with the name I was entering. Once you know the account exists and has a mailbox on the Exchange server the follow these steps.
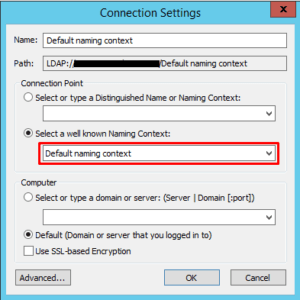
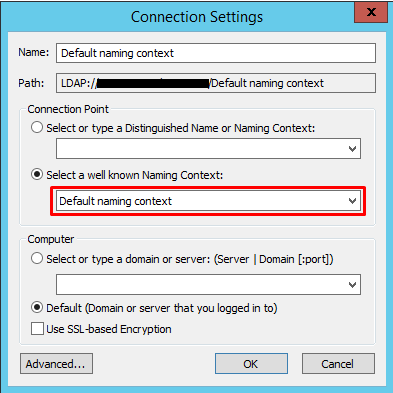
- On the Exchange Server 2013, click Start, Run, type ADSIEdit.msc and press ENTER.
- Right-click ADSI Edit and connect to the Domain naming context.
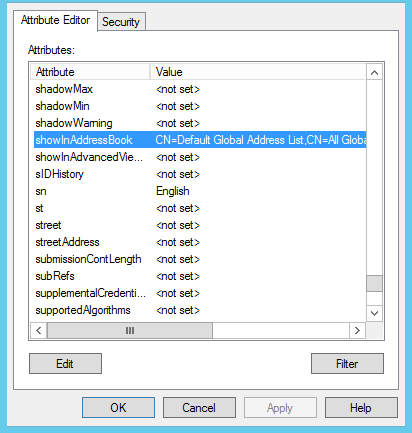
- Locate a user whose profile is not having any problems by going to the OU where the user’s account is located and then find the folder (e.g. CN=BillG).
- Right-click the folder (e.g. CN=BillG) and select Properties.
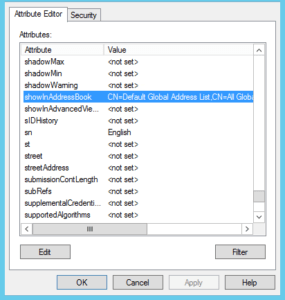
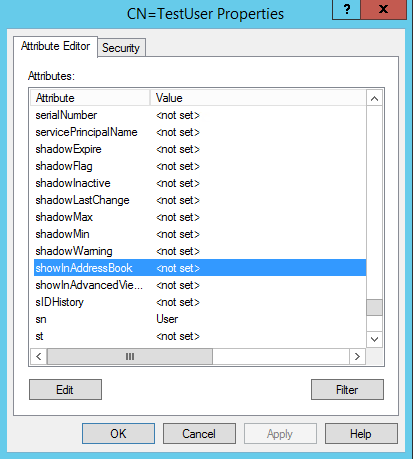
- Locate the attribute showInAddressBook, as shown below.
- Double-click the attribute to edit the Multi-valued String. You will notice two entries.
- DO THIS STEP VERY CAREFULLY. DO NOT RUSH. Select one of the two entries and click Remove. This will move the text to the Value to add box. Copy this text and paste it in Notepad because you will be copying this value to the account that is having a problem. Click Cancel after copying the text to Notepad.
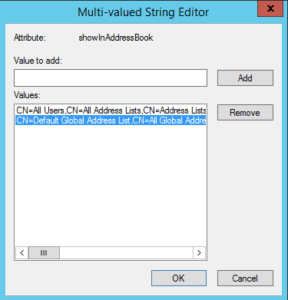
- Go back and edit the Multi-valued String again and this time repeat the above step for the second entry. Click Cancel after copying the text to Notepad.
- Click Cancel again to exit the user account properties window. Hopefully, you didn’t make any changes to the properties of this user account that is working just fine.
- Now locate the OU where the user account having the issue is located.
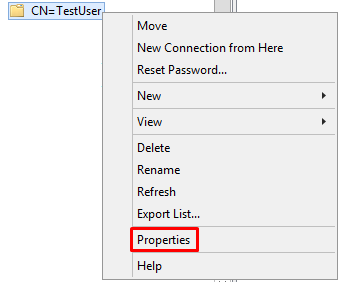
- Within the OU locate the user account folder (e.g. CN=TestUser), right-click the folder and select Properties.

- Locate the attribute showInAddressBook. Notice there are no values set for the user and that’s why Outlook can’t locate the user account.
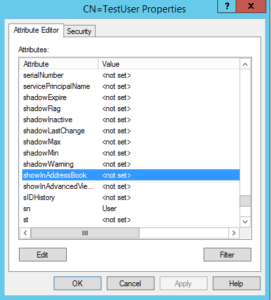
- Double-click the attribute showInAddressBook.
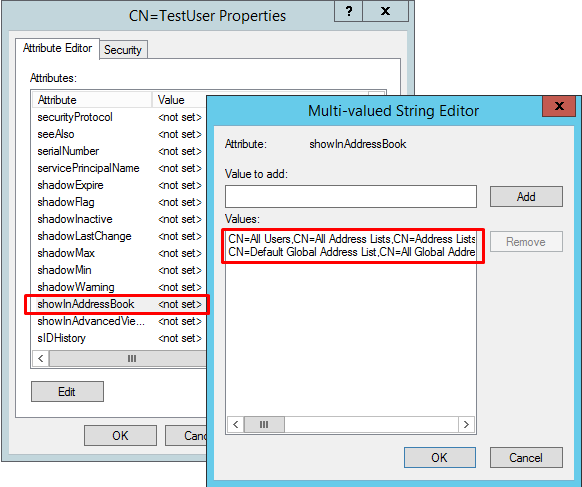
- Past the value that starts with “CN=All Users,CN=All Address Lists,CN=Address Lists Container,CN=……” in the Value to add box and then click Add.
- Past the value that starts with “CN=Default Global Address List,CN=All Global Address Lists,CN=……” in the Value to add box and then click Add.
- Before you click OK your screen should look similar to the following screenshot.

- Click OK twice and then close the ADSI Edit console.
- Try to create the user’s Outlook profile again and hopefully this time you will have no problem adding the user mailbox. If you still can’t add the user mailbox in Outlook and the account is hidden from the address lists, try unhiding the account from the address lists, adding the user profile in Outlook and then hide the account again.

Copyright © 2015 SeattlePro Enterprises, LLC. All rights reserved.


Helpful!
Thanks!!!
Perfect, the second resolution worked for me!!