LastPass Extension Keeps Disappearing from Google Chrome Toolbar

LastPass is one of the most popular free password managers available today. There is a known issue with the LastPass extension in Google Chrome, which makes the LastPass extension occasionally disappear from Google Chrome. This issue has been a nuisance for people around the world for as far back as May 21, 2015. At least that’s the earliest record I’ve seen when this issue was first reported. The problem is experienced in Google Chrome on PCs and Macs. This issue has been brought up in various forums, including LastPass forums, many times over the years. Unfortunately, LastPass doesn’t have a solution for this bug that I am aware of. The only workaround that seems to work reliably is to reinstall the LastPass extension in Google Chrome.
Here’s how you can add the LastPass extension to Google Chrome in Standard Mode and Incognito Mode. The instructions are written for Windows 10, but the concepts are the same for macOS.
Add LastPass Extension to Chrome in Standard Mode
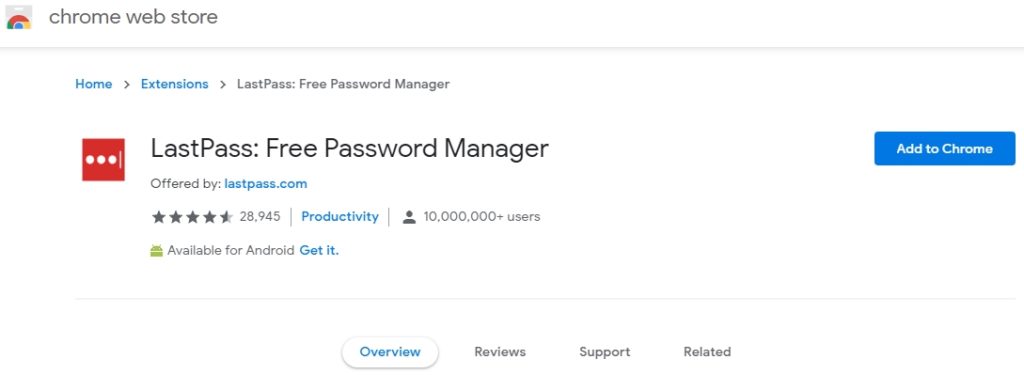
- Go to this URL to add the LastPass extension to Google Chrome.
- Click Add to Chrome.

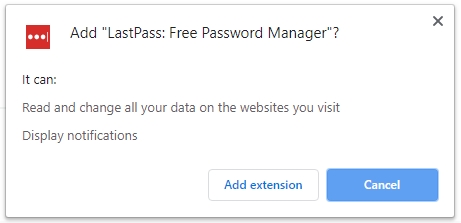
- Click Add extension.

- The LastPass extension will be added to your Google Chrome browser and you will see the LastPass icon (three dots) on the tool bar.
Before going through the steps to configure LastPass extension in Google Chrome’s incognito mode, let me first explain incognito mode to those who are not quite familiar with the concept.
What is Incognito Mode?
Most people browse the Internet in Standard Mode. People who are more concerned about security and privacy like to run their web browsers in Incognito Mode. When you browse using incognito mode in Google Chrome, or any other browser for that matter, your browsing history, cookies, site data, or information you enter in forms is not saved. This enhances security and protects your privacy. You are still able to download files and add bookmarks normally and they will be available to you in both standard and incognito mode. However, keep in mind that incognito mode doesn’t hide your browsing history from your employer, school, Internet Service Provider (ISP), or the websites that you visit. If you want complete privacy and want to browse the web anonymously so no one can keep track of your browsing history, you can use Tor browser, or use a Virtual Private Network (VPN).
NOTE: The Incognito mode in Google Chrome is called Private window in Mozilla Firefox, InPrivate in Microsoft Internet Explorer and Private browsing in Opera browser.
Add LastPass Extension to Chrome in Incognito Mode
If you go to this URL to add the LastPass extension to Google Chrome and you’re running your browser in incognito mode, you will see the following warning.
Some of the functionality of the Chrome Web Store is not available in the Incognito mode.
- If you prefer to use your browser in incognito mode, simply switch to the standard mode to install the LastPass extension as described earlier in this article and then switch back to incognito mode.
- After the LastPass extension is added to your Google Chrome browser, you won’t see the LastPass icon on the tool bar unless you allow the extension in incognito mode.
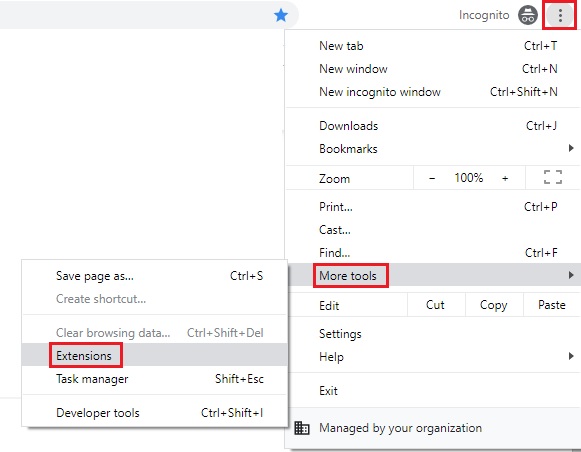
- Click the Google Chrome menu icon (three vertical dots) in the upper right corner of your browser and then select More tools -> Extensions.
NOTE: The extensions window always opens in standard mode. When you are done making the changes, you need to close the standard window and go back to your incognito window.

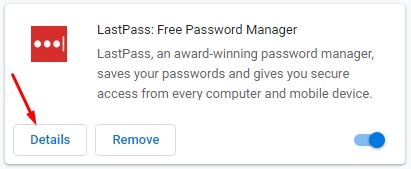
- Notice the LastPass extension is already enabled. However, by default it’s only enabled for the standard mode, not the incognito mode. To enable it for incognito mode, select Details button.

- Go to the section Allow in incognito and enable the option so it turns from gray to blue.

- As soon as you enable the option Allow in incognito, it will display the LastPass icon in the toolbar in incognito mode. As mentioned earlier, the extensions window always opens in standard mode so you need to switch back to the incognito window to verify that the extension is visible.
Selecting the LastPass Icon for Incognito Mode
If you use Google Chrome’s incognito mode and use LastPass password manager, it’s important to consider which LastPass icon you should display on the toolbar. You can change the default icon for LastPass in Google Chrome by right-clicking the LastPass icon and selecting Options.
Here you can select from one of the four options. Although the default icon (first one in the screenshot below) is not bad in incognito mode, I recommend selecting the highlighted option for the incognito mode. It works well in both the incognito and standard mode. Avoid selecting the lock icon for incognito mode because the incognito mode has a very dark gray (almost black) browser background, which literally makes the black lock icon hard to see (try switching it to the lock icon and you will see what I mean). Once you sign in and the icon turns red, it’s easier to see.
NOTE: You can change the dark brown Google Chrome background in incognito mode to a lighter color by following the tips in my article Did Your Google Chrome Tabs Changed Colors in Incognito Mode After an Update?
In order to see the change, you must restart your browser.
Additional Reading
Here are some related articles that you might be interested in.
- The Advantages of Using a Password Manager
- Selecting a Password Manager
- How to Set Up LastPass for PIN Authentication on Your Smartphone
- How Secure are Online Password Managers
- Did Your Google Chrome Tabs Changed Colors in Incognito Mode After an Update?
| Thanks for reading my article. If you are interested in IT training & consulting services, please reach out to me. Visit ZubairAlexander.com for information on my professional background. |
Copyright © 2019 SeattlePro Enterprises, LLC. All rights reserved.


