WordPress Blog Not Receiving Notification Emails for Posted Comments

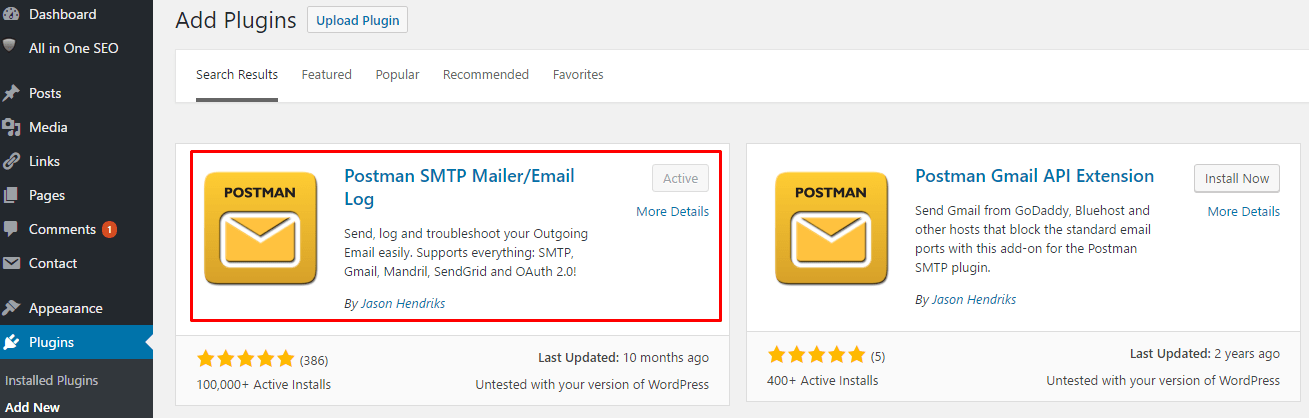
For years I have been receiving emails from my WordPress blog when users post comments. One day I stopped receiving them. I tried the usual steps, disabling plugins, changing the email address, changing the email to a different domain, temporarily switching to a different theme to eliminate my theme being an issue, etc. but still couldn’t get the email notifications to show up in my Inbox. Then I read in one of the forums that I should try the Postman plugin. I did a search for the Postman plugin from the Plugins page in WordPress and installed the following Postman SMTP Mailer/Email Log plugin, created by Jason Hendriks.
The plugin takes seconds to install. The configuration could be tricky if you are not an expert in WordPress, or haven’t used Google tools. I use a lot of Google tools and keep track of the emails that I am using for those tools because some of them are for business and I keep them separate. I am documenting the steps in the article to help out readers who are stuck during the configuration of the plugin and not sure what to do.
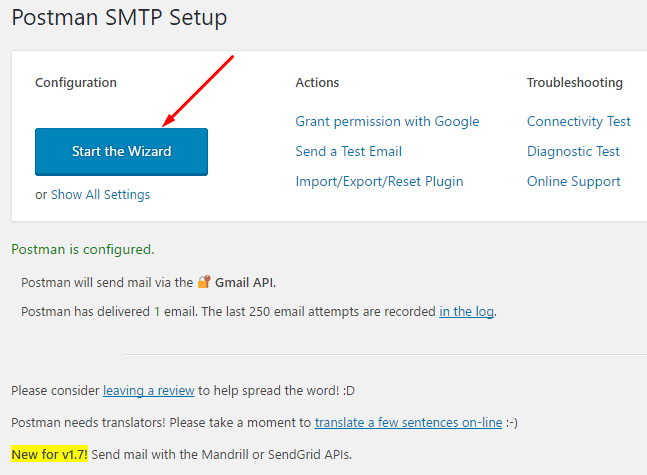
First of all, after you install and activate the plugin, use Start the Wizard option because it is easier than using the manual setup option.
You won’t have any configuration to import and will be taken to step 2 (Sender Details). Your email address should have been copied by the setup for you. If you never used an email in the past then you probably won’t be reading this article because you don’t have the problem of not receiving email notifications because you never setup an email and never received notifications in the past. Verify or enter your name in the name box and then click Next.

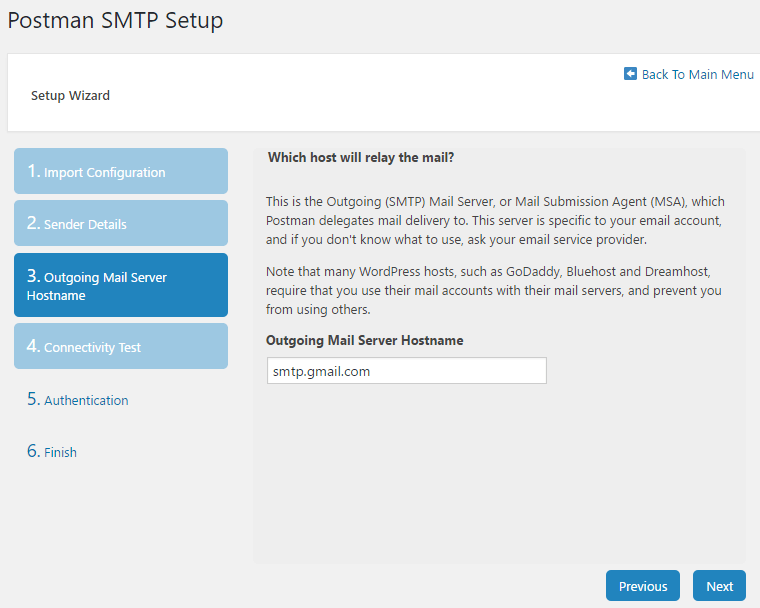
Verify the outgoing mail server hostname. If you are using Gmail, it will be smtp.gmail.com and it should have already been entered for you. Click Next.
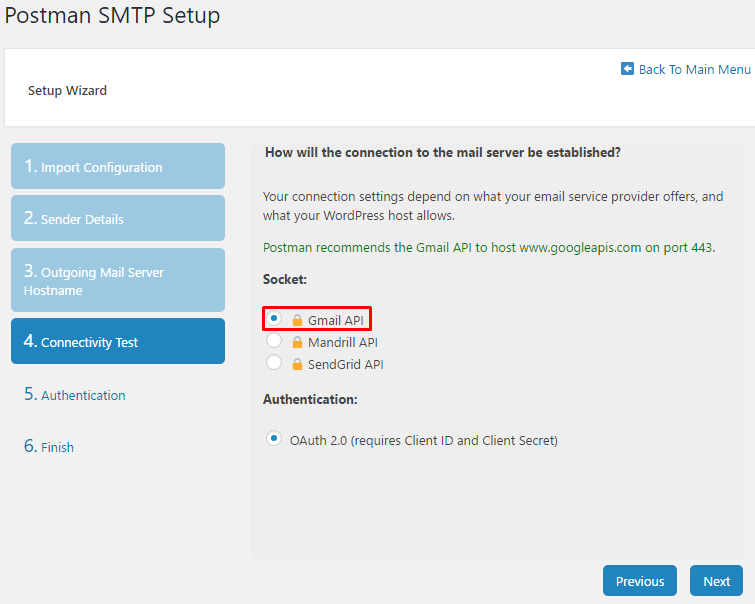
You will be taken to the Connectivity Test page. Make sure Gmail API is selected and click Next.
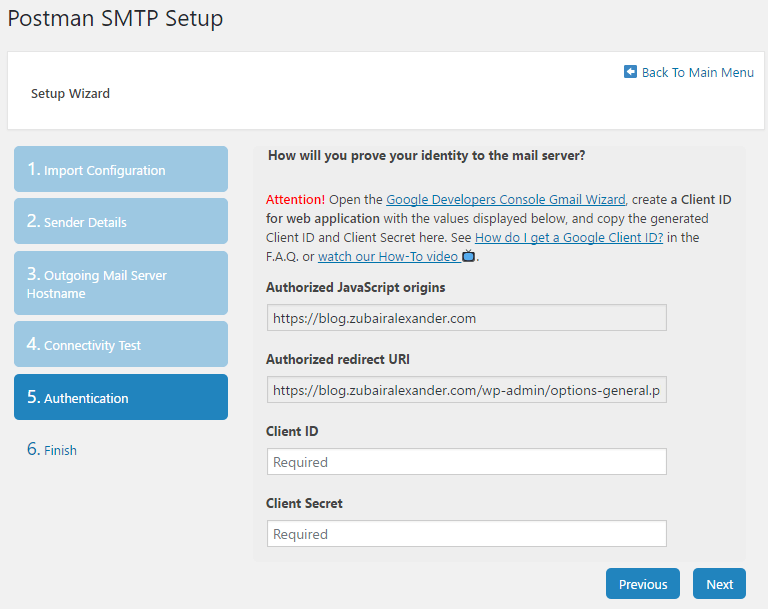
This Authentication step is the main screen for configuration. If you make an error on this step, your plugin won’t work. The links on this page can be useful if you get stuck. Click on the Google Developers Console Wizard hyperlink. You must login to the developers console with the same email address that you are using to configure your blog. What you need to do is get your Client ID and Client Secret from Google.
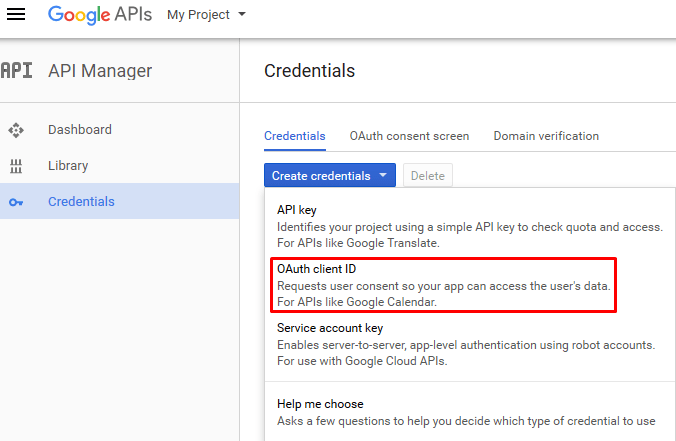
Create a new Project. Use these instructions if you need help. The instructions may not match exactly with what you see on the screen. Your goal is to create a new OAuth client ID. Do not create an API key.
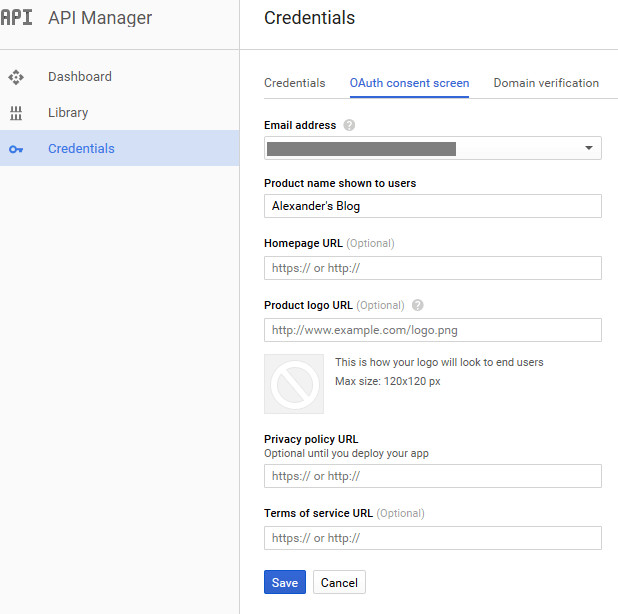
If you need help, try this page. If you get lost during the process and are asked to go back to the consent screen, use the middle tab (OAuth consent screen). You only need your email and a name for the client ID on this screen, before you click Save.
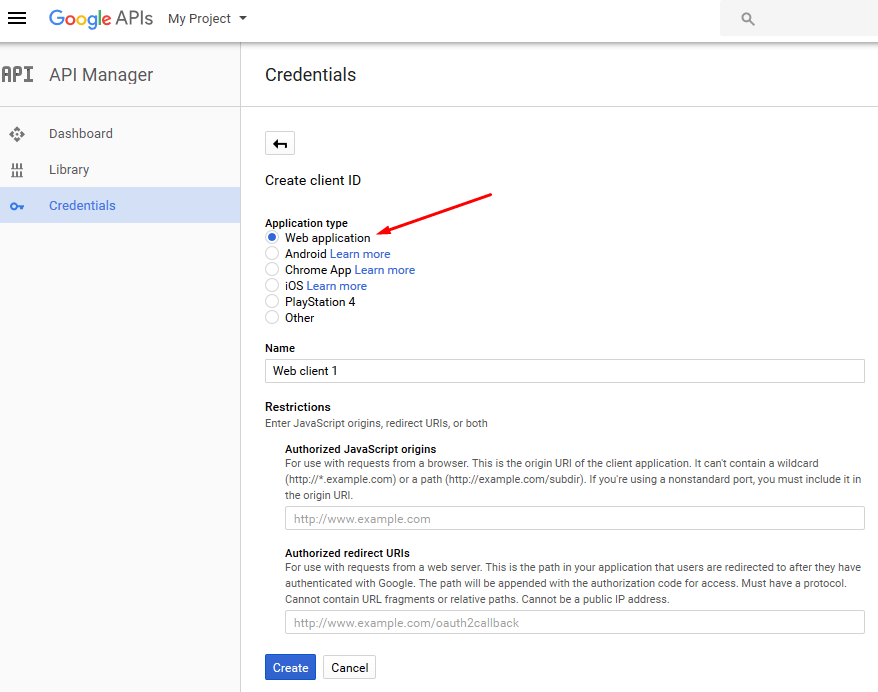
Now you will be able to create the credentials that are necessary. On the Credentials tab select OAuth client ID. You are almost there! The options on the Create client ID screen are pretty simple. Select Web application radio button and either accept the default name Web client 1, or enter a different name. Next you will copy and paste the Authorized JavaScript origins and Authorized redirect URIs from step 5. Authentication of the Postman Setup. Click Create and you will see the Client ID and the Client Secret. Copy these and paste them in step 5. Authentication screen.
Click Next to Finish the Postman setup. I recommend you take the following three actions at this point. They are self explanatory and easy to follow.
- Grant permission with Google.
- Send a Test Email.
- Import/Export/Reset/Plugin.
The last option will let you export your Postman plugin configuration. At the end, I posted a comment in one of my posts just to verify that I am receiving the emails when a comment is posted. I forced a Send/Receive in my Outlook and received the email within seconds.
Copyright © 2017 SeattlePro Enterprises, LLC. All rights reserved.


Very good post! We are linking to this particularly great post on our site.
Keep up the good writing.