How To Change Windows 8 or Windows 8.1 Network Location

When you install Windows 8 or Windows 8.1 and connect to a network, you are prompted to select a location for the network. You can choose from Home, Work or Public. Because Home and Work are considered Private networks, Windows will automatically configure firewall settings that are appropriate for a private network. If you are using a laptop and walk in to a public place like Starbucks, you will select Public so windows can configured the appropriate firewall to connect to the Starbucks WiFi network and secure your laptop.
At times you may decide to modify your network location. For example, if you were installing Windows 8.1 Pro and selected the network location to be Public but later decided to make it Private you will need to modify the network location. Unfortunately, changing the network location is not very intuitive on most Windows operating systems. In this article I will show you how to change the network location for Windows 8 or Windows 8.1. This technique works on both the Professional and Enterprise versions of Windows 8 and Windows 8.1.
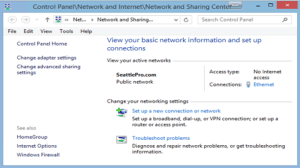
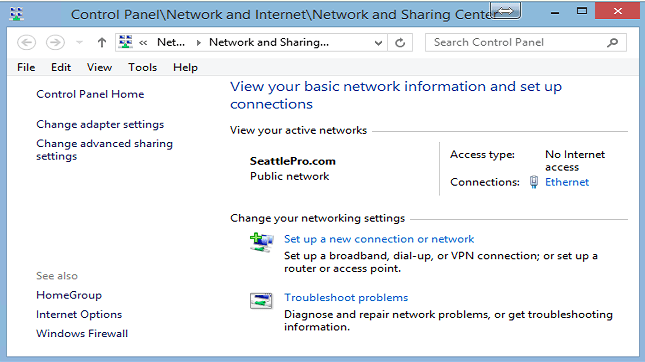
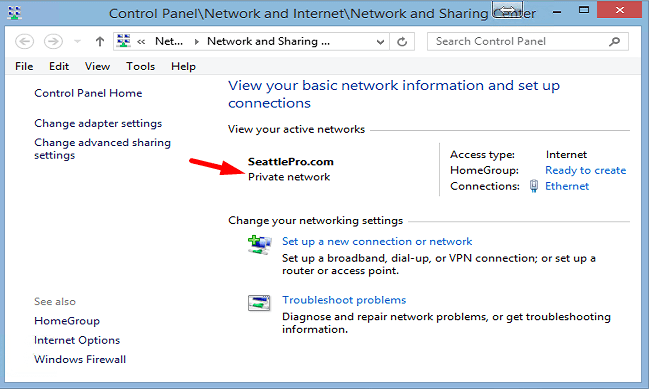
- Open Network and Sharing Center either using the network icon on the taskbar or from the Control Panel.
- Your current network location is displayed, such as Public network. The name of the network depends on the DNS settings configured for the computer.
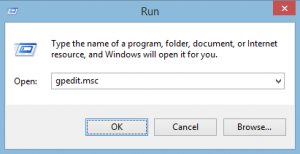
- To change the network location, hold the Windows logo key and press R on the keyboard to bring up the Run box.
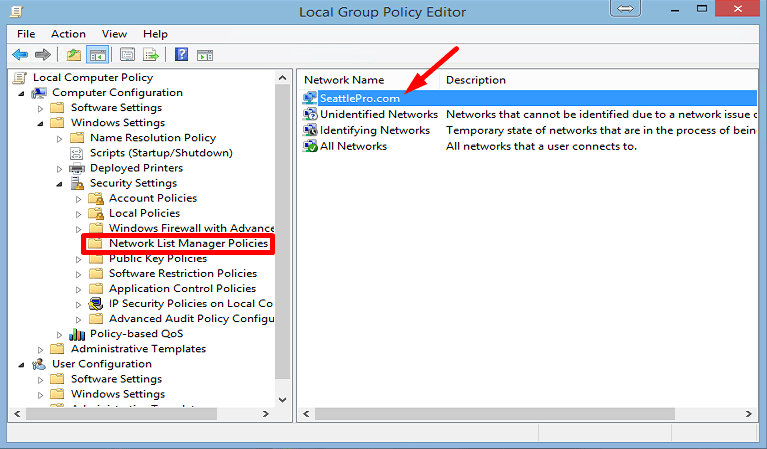
- Type gpedit.msc and press ENTER. This will load the Local Group Policy Editor.
- Go to Computer Configuration -> Windows Settings -> Security Settings -> Network List Manager Policies.

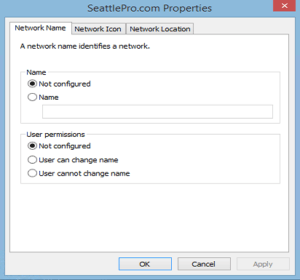
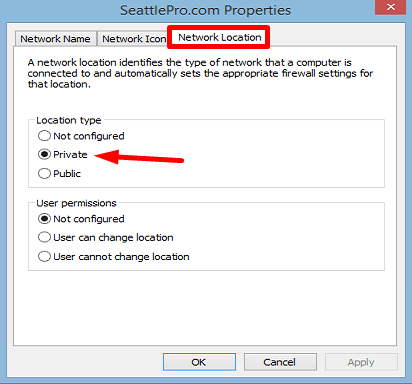
- In the right-hand pane double-click your network name. Select the Network Location tab and change the location type to Private. As mentioned earlier, for Home or Work network you should select Private, for a Public network you should select Public.

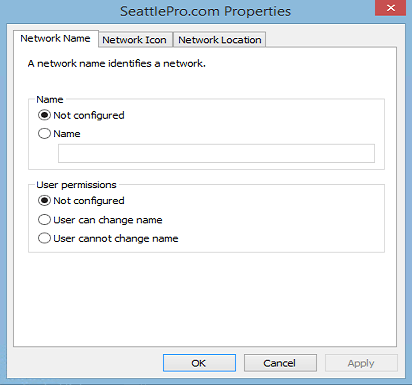
- If you want to change the current network name to something else you can do that on the Network Name tab. Whatever you type in the Name box will overwrite your current network name that is displayed in the Network and Sharing Center. If you later decide to revert to the default setting obtained from the DNS configuration, simply change the setting back to Not configured.
- Click OK and then close the Local Group Policy Editor console.
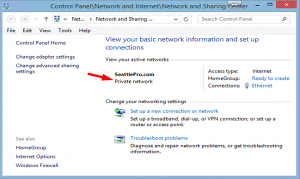
- Your network location should now display Private network in the Network and Sharing Center. If you are connected to a home network then you will also see an option to create a HomeGroup. If your computer has joined your domain at work then the Network location will be displayed as Domain network.

The Network Location tab is not available on all versions of Windows. For example, Windows 8 Pro and Enterprise as well as Windows 8.1 Pro and Enterprise have this tab but Windows 7 Ultimate does not. I haven’t had a chance to check Windows 7 but it is unlikely to have this tab.
Copyright ©2014 Zubair Alexander. All rights reserved.


Gpedit.msc does not exist in 8.1. It would be great if it was as easy as dos.
Paul, you may be using Windows 8.1 Home Edition. I don’t use the Home Edition, but I understand that Home, Home Premium, and the Starter Edition don’t include the Group Policy Editor (GPEdit.msc).