Customizing the Windows Command Prompt

Windows Command Prompt is a system application that allows you to accomplish several important tasks. It’s especially useful for Windows administrators because some of the critical network-related tasks can only be performed at the Command Prompt. If you are a Network Administrator, chances are that you use the Command Prompt on a regular basis. It’s important to note that the Command Prompt is not Microsoft Disk Operating System (MS-DOS) Prompt. In MS-DOS, the Command Prompt executable file was command.com. Up to Windows 9x, it was still referred to as MS-DOS Prompt. However, the later Windows operating system replaced the old MS-DOS prompt with a Win32 Console (cmd.exe), which is a 32-bit application simulating the MS-DOS Prompt. Whether it was the old 16-bit MS-DOS Prompt, or the newer Win32 Console known as Windows Command Processor, they both allow you to run command-line utilities. The Windows Command Processor, which I will refer to as Command Prompt from now on because that’s the term most people are familiar with, also lets you execute batch files, PowerShell scripts, and applications. And if that’s not enough, it’s a window that can be customzied. In Windows 10 you can easily replace the Command Prompt console with the PowerShell console on the Start menu. It’s essentially a PowerShell enabled Command Prompt console so you get the best of both worlds. You can run all the Command Prompt utilities and all the PowerShell tools in the same console. The Command Prompt even allows you to copy and paste text into the console, which can come really handy.
I have been using the Command Prompt since its inception and have a habit of tweaking the console to make it easy for my usage. It takes me only a couple of minutes to tweak the Command Prompt so whether I add a new Windows Server or workstation on my own network or for my customers, I customize the Command Prompt. In this article I will show you how I customize the Command Prompt. You can use the information in this article as a guideline and configure your Command Prompt the way that works best for you. Depending on the Windows operating system you are using, the Command Prompt options may be slightly different. The screenshots in this article are from Window 10 Pro.
Configuring the Command Prompt
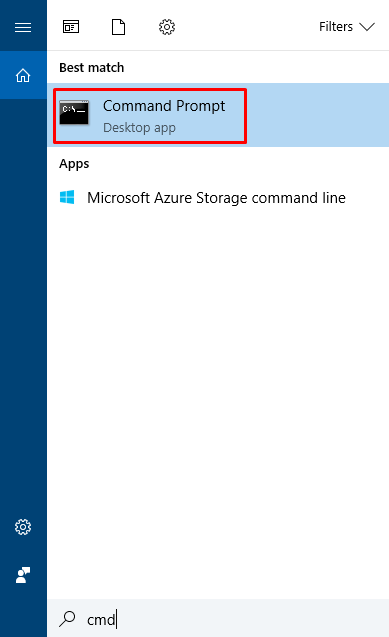
- In Windows 10, click the Search box and type cmd and click Command Prompt Desktop app. You can also type the word command instead of cmd in the search box.
NOTE: Depending on how you have configured your Windows 10, the Search will either be an icon (like the one I have) which looks like a magnifying glass, or it would be a Search box which is a box with a magnifying glass and the words “Type here to search.”
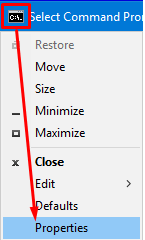
- In the top-left corner click the small box in the title bar that has C:\ in it.
- On the Options tab, select Large for the Cursor Size and make sure the Quick Edit Mode is selected. A large cursor is easy to find on a large screen. You can also customize the Windows cursor if you want it to be darker or have a different shape. In Windows 10, by default Quick Edit Mode is enabled. In older Windows operating systems this mode is disabled. This mode allows you to copy a text (e.g. an IP address from another application) and paste it in the Command Prompt console simply by using the right-click on your mouse. You can also use the mouse to click and drag any area of text that you would like to copy. It could be one character, a line, or multiple lines of text. Once you have selected the area with the mouse, press the ENTER key to copy it. When you go to another application (e.g. Word) you can paste the text using the mouse or CTRL-V keyboard combination. The formatting of the text will be preserved when you paste it in Word. For example, if you copy and paste information after you use the IPCONFIG command, your formatting would look exactly what it was in the Command Prompt.
C:\Users\Administrator>ipconfigWindows IP ConfigurationEthernet adapter Ethernet:Connection-specific DNS Suffix . : Contoso.com
Link-local IPv6 Address . . . . . : fe80::c1b6:ec46:1b2a:3d73%21
IPv4 Address. . . . . . . . . . . : 192.168.0.25
Subnet Mask . . . . . . . . . . . : 255.255.255.0
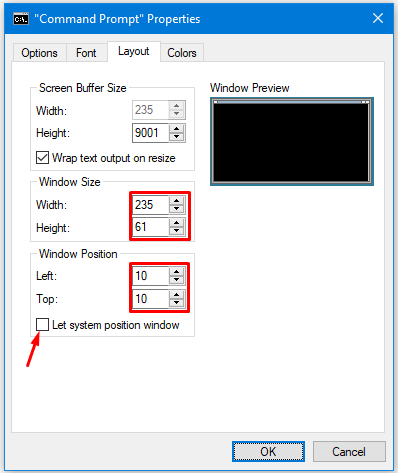
Default Gateway . . . . . . . . . : 192.168.0.1 - I will skip the Font tab for now and go to the Layout tab. Here you can decide how you want to position your Command Prompt window. I like to configure the Window Position first so I am using as much screen area as possible. I uncheck the box Let system position window. This is important because I want to decide how far the window edge should be from the left and top side of my screen. I set the left and top position to be 10 so that I am not starting right at the edge, just a little bit away from the edge. Then using my mouse I slowly keep increasing the Width of my Window Size until it reaches about the same amount just close to the edge, but not touching it. Then I increase the Height of the Window Size slowly until it’s close to the edge. It’s best to leave some extra room at this point because you can always go back to adjust the window size later. In previous version of Windows I always had to adjust the Screen Buffer Size because it was too small. There is no need for me to do that in Windows 10. The buffer size controls how much data you can see and how far down you can scroll. A buffer size of 9001 is huge and it’s unlikely that you would have to adjust this in most scenarios.
NOTE: You should always adjust the Window Position before you adjust the Window Size.
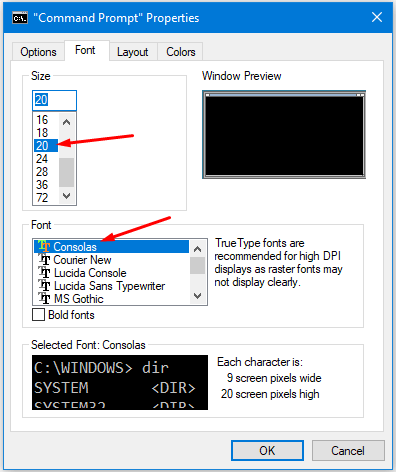
- Now I will go to the Font tab and select the type of font I want. I skipped the Font tab in the previous step because I need to configured the Layout tab first so I can select a font that’s big enough for my screen. I have tried other fonts, but I prefer to use the default Consolas font. You may like a different font. For the font size, try a size that is appropriate for your screen size. When you select the font, you can see the size in the bottom window. I selected size 20 for my screen, which is 20 screen pixels high. You can always go back and select a different font size later.
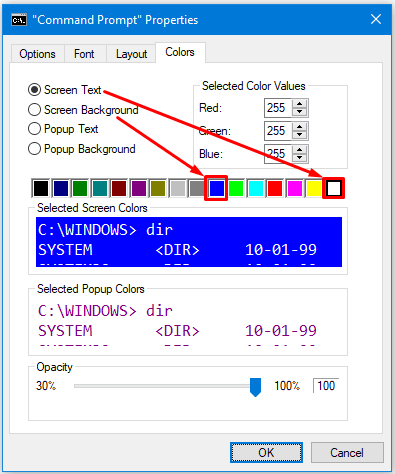
- On the Colors tab, you can select the colors for screen background and text. I prefer bright blue Screen Background with a white Screen Text. For Screen Background, select the option first and then select the color. Do the same for the Screen Text. Once you have selected the colors you like, click OK.
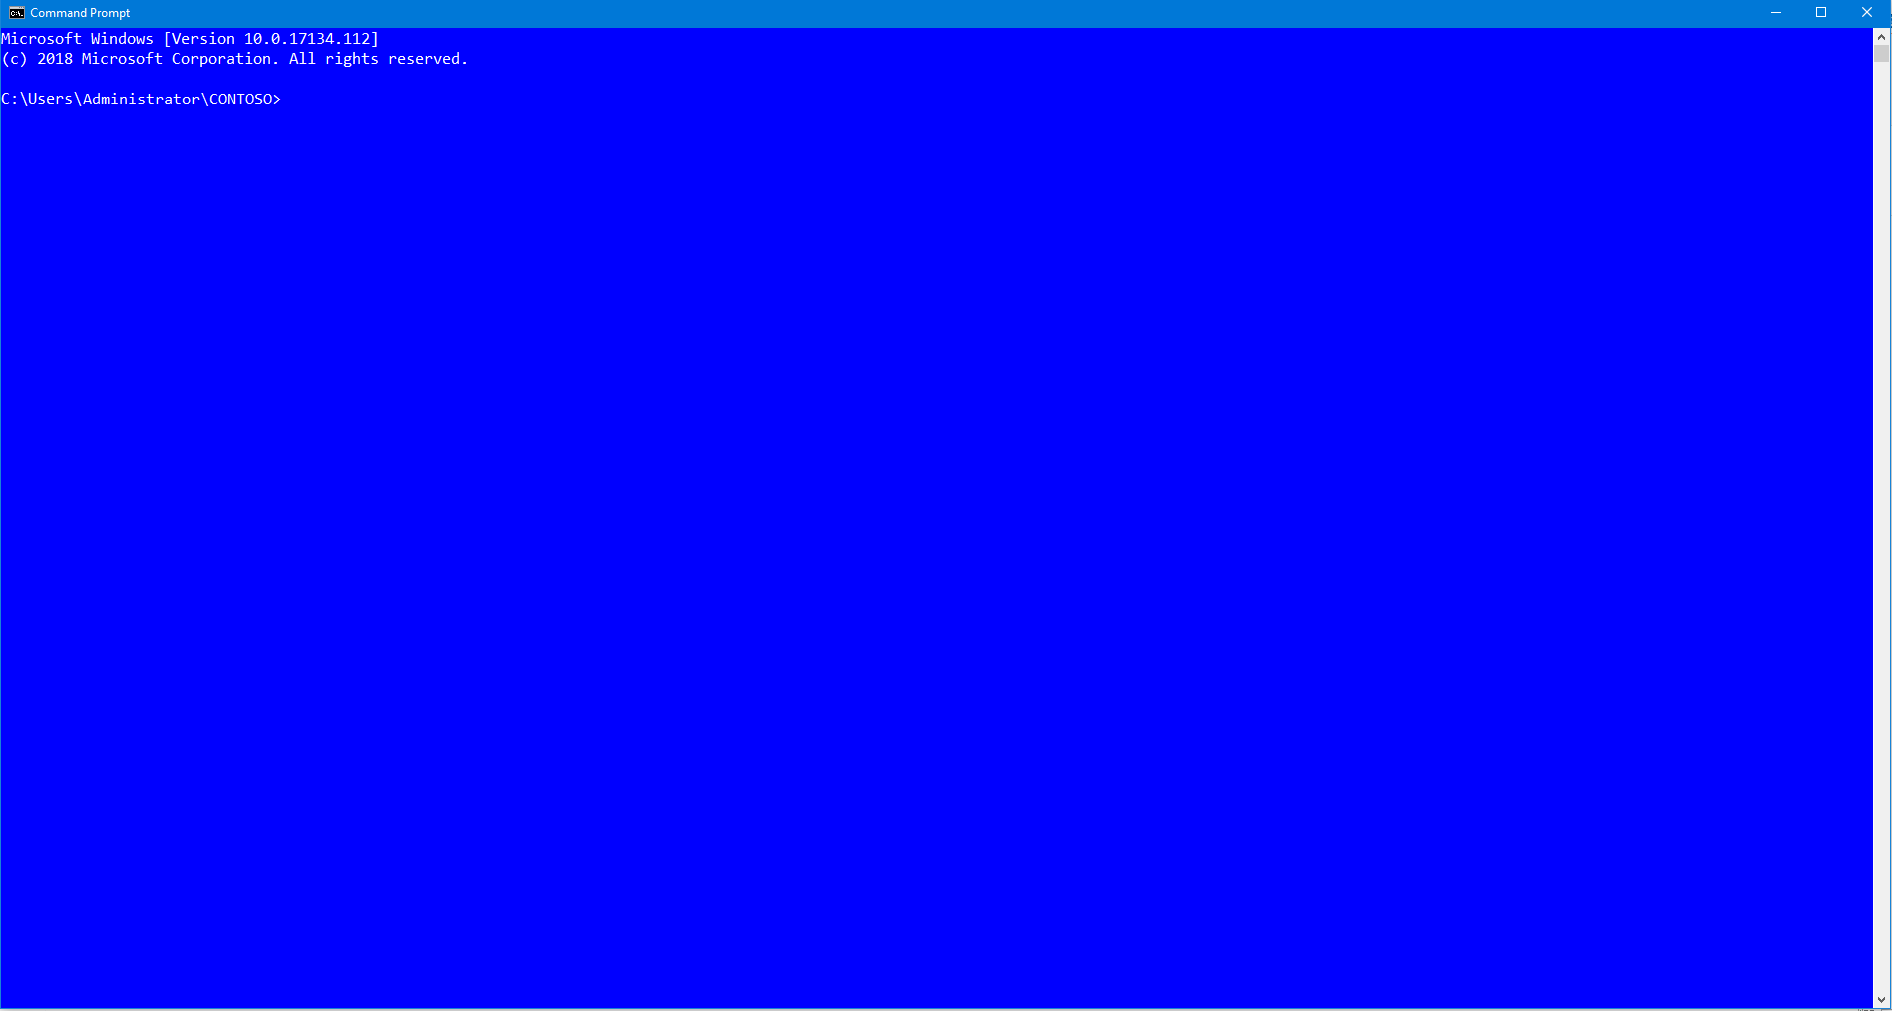
- Keep in mind that you may have to go back and adjust the Window Size on the Layout tab. My Command Prompt window looks like this.
- I also like to pin my customized Command Prompt to my Windows 10 taskbar for quick access. In the first step above, instead of left-clicking on the Command Prompt, right-click and select Pin to taskbar.
- Finally, I configure the Command Prompt so it always starts with administrative credentials. Otherwise, there are some tasks or commands that won’t work. Once you have pinned the Command Prompt application to the taskbar, right-click the icon, then right-click Command Prompt, then left click Properties. Remember you are right-clicking twice and left-clicking once to get to the properties of Command Prompt.
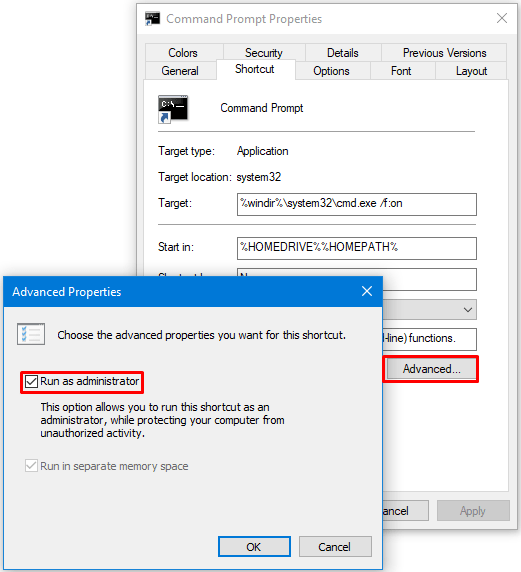
- On the Shortcut tab, click Advanced, select the box Run as administrator and then click OK.
Bonus Tip
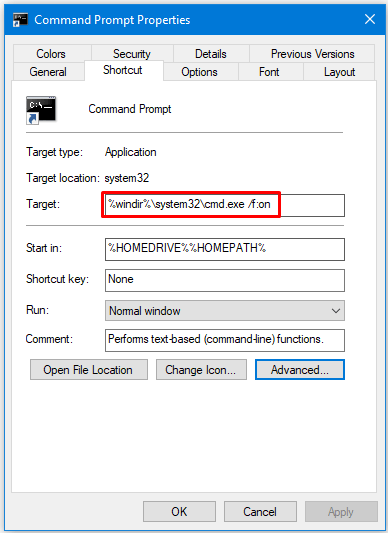
Here’s a bonus tip that you may find helpful. Customize the Command Prompt so that you can search through the folders quickly and Change Directory (CD) quickly without typing long folder names. In the Target box in Step 10, at the end of the path to the executable file add a space and type /f:on. Click OK to close the window.
By adding the /f:on switch you will be able to save yourself time. Let’s try it out. Go to the Command Prompt. You should be in Windows\System32 folder. Type DIR /P. Now use CTRL-C keyboard combination to cancel the operation. Let’s say you want to change to the folder called AdvancedInstallers or Printing_Admin_Scripts. Type CD, then a space, and instead of typing the name of the folder, simply use the CDTL-D keyboard combination to cycle through the list of folders in System32 until you find the one you want. When You find the target folder, release the keys and press the ENTER key. Instead of searching forward, you can also go backwards using CTRL-SHIFT-D. This technique is handy not only when you want to use the CD command to change directory (i.e. folder), it can also be used to simply search for the names of the folder. When you have hundreds of folders and files, this is an easier way to locate the target, rather than scrolling through pages of information or switching to File Explorer.
Do you have any other tips or tricks to customize the Command Prompt that you would like to share with the readers?
| Thanks for reading my article. If you are interested in IT training & consulting services, please reach out to me. Visit ZubairAlexander.com for information on my professional background. |
Copyright © 2018 SeattlePro Enterprises, LLC. All rights reserved.


I”m trying (as a new Win 10) administrator who works from home to be able to do what is now replaced by the /p to allow me to list the contents of a folder one page at a time. Tried searching on internet, found you.. I’m sorry that I’m not allowed to give my work email or website. Thanks so much in advance, Sandy
Thank you for your feedback, Sandy. You don’t need to give out your work email or website. I only require the readers’ real name (either just first name, or first and last name) and email. Your name is published but your email is never published on the Internet. The email is used in rare situations when someone asks me a question, or requests a file, that requires me to contact the person directly.
I am glad you found the answer you were looking for.