Is Your WordPress No Longer Sending Emails from Contact Form or Comments?

The other day I noticed that I stopped receiving emails from my blog when readers would comment on my articles. I know this has been an issue in the past and I have written an article a while back on using a plugin to solve the problem. However, that plugin is now outdated and no longer updated. This time I decided to use a different plugin. In this article, I will show you how to use the WP Mail SMTP plugin to solve your email problem. Because a lot of people use Gmail, I am going to set up Gmail as a mailer in this article, but you can also use PHP, Mailgun, SendGrid, or some other SMTP as your mailer.
Why Does WordPress Have Issues With Email Delivery?
The creator of WP Mail SMTP plugin believe that the issues with the email delivery in WordPress has to do with the following.
“Popular email clients like Gmail, Yahoo, Outlook, etc are constantly improving their services to reduce email spam. One of the things their spam tools look for is whether an email is originating from the location it claims to be originating from.
If the proper authentication isn’t there, then the emails either go in your SPAM folder or worst not get delivered at all.
This is a problem for a lot of WordPress sites because by default, WordPress uses the PHP mail function to send emails generated by WordPress or any contact form plugin like WPForms.
The issue is that most WordPress hosting companies don’t have their servers properly configured for sending PHP emails.
The combination of two causes your WordPress emails to not get delivered.”
How to Install and Configure “WP Mail SMTP” Plugin
Here are the step-by-step instructions to install and configure the WP Mail SMTP plugin.
- Log in to your WordPress site.
- From the WordPress Dashboard, install the WordPress plugin called WP Mail SMTP.
- Activate the plugin.
- In WordPress Dashboard, go to Settings -> WP Mail SMTP and configure the settings as follows.
From Mail: Because I am using Gmail as a mailer, I will use the Gmail account that I plan to use for this site.
Force From Email: Checked
From Name: The name which emails are sent from. For example, I use Alexander’s Blog on my Web site.
Force from Name: Checked
Mailer: Gmail
Return Path: Checked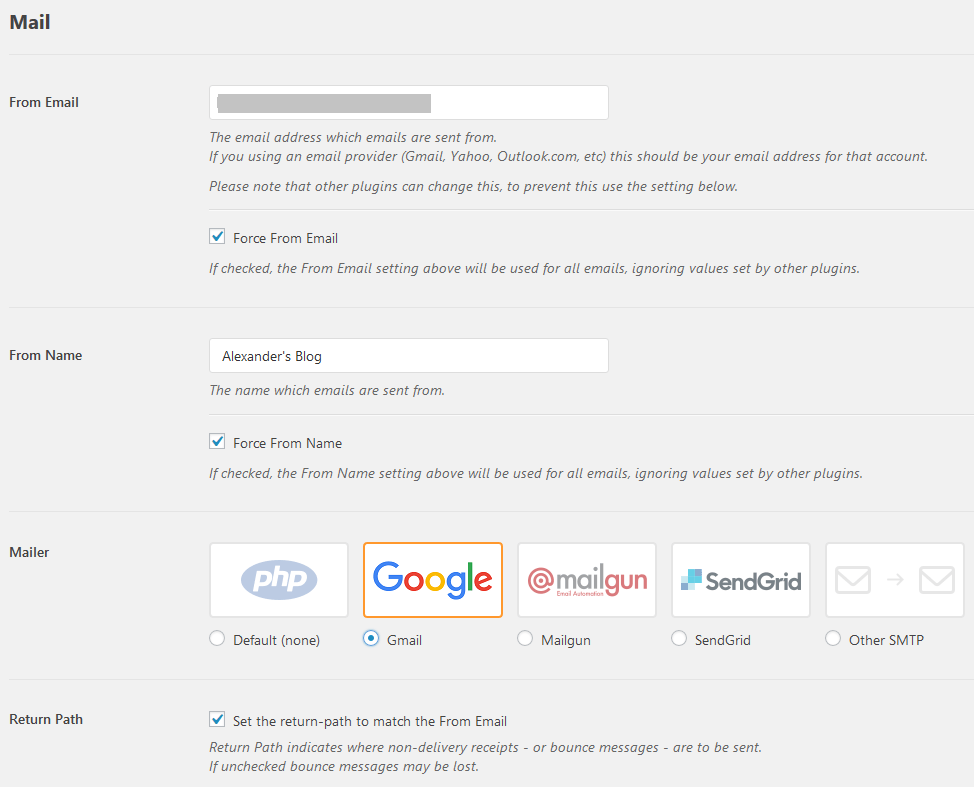
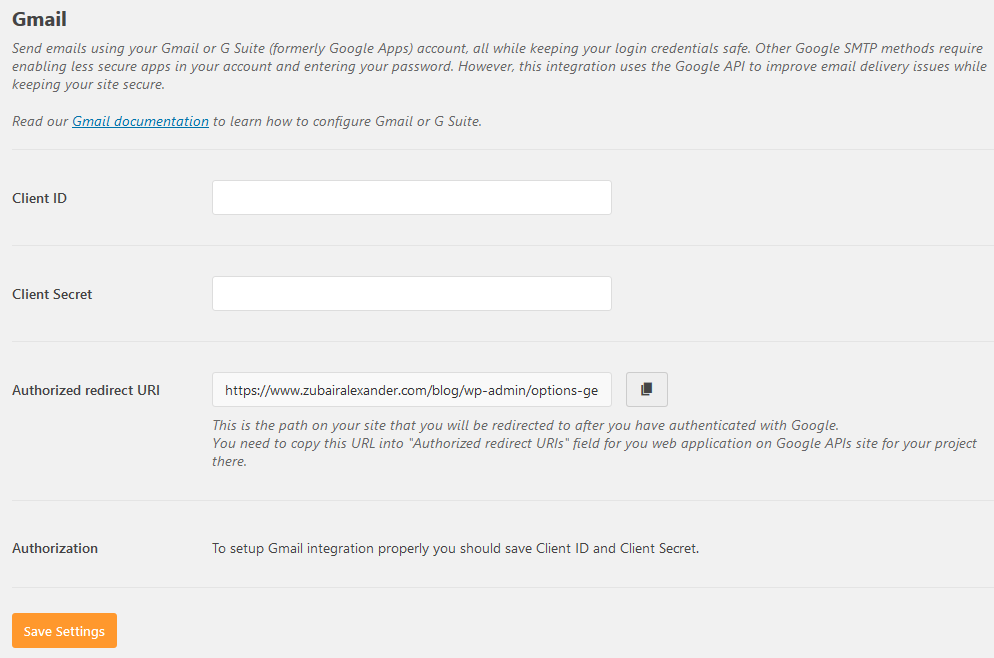
- Click the Save button. Now you will see a Gmail section where you will be adding Client ID, Client Secret, and an Authorized redirect URI. Copy the Authorized redirect URI and save it somewhere (e.g. Notepad) because you will need this in a later step.
- Log in to your Gmail account that you are going to use for your site (e.g. YourEmailAddress@gmail.com). This will be the email that sends messages from WordPress to you.
- Go to the Google Developers Console. If you are logging in to this site for the first time, you’ll need to agree to the Terms of Service before you can continue.
- Click Create in the upper right-hand corner to start a new project. If you already have other project on this dashboard, simply create a new project.
- In the Project name box type WP-Mail-SMTP and then click Create. For simplicity and to make sure everything works flawlessly, I recommend you only use the name WP-Mail-SMTP. I’ve tried other names and used spaces in the name and it didn’t work for me because the URI that the plugin provides didn’t match with my name. I then removed the spaces and put hyphen to match what’s in the URI and it worked like a charm. You don’t need to select a location, even though it has an asterisk indicating it’s a mandatory field, just leave the field as is. After giving the project a name, simply click Create.

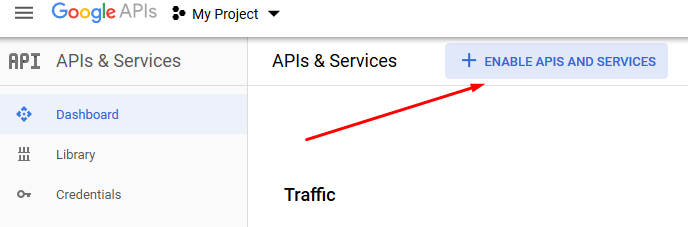
- Once the project has been created you will be taken to the Google APIs dashboard. On the APIs and Services page, click Enable APIs and Services.
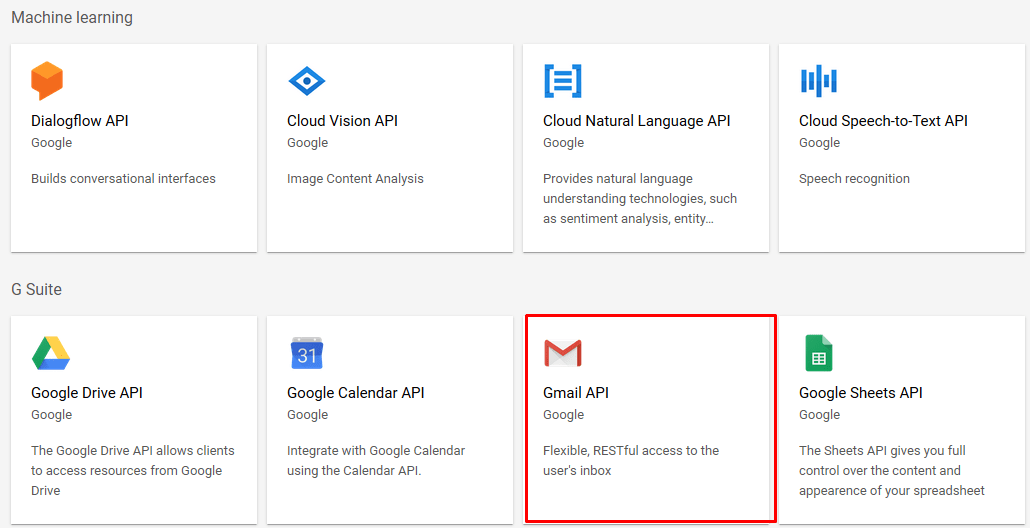
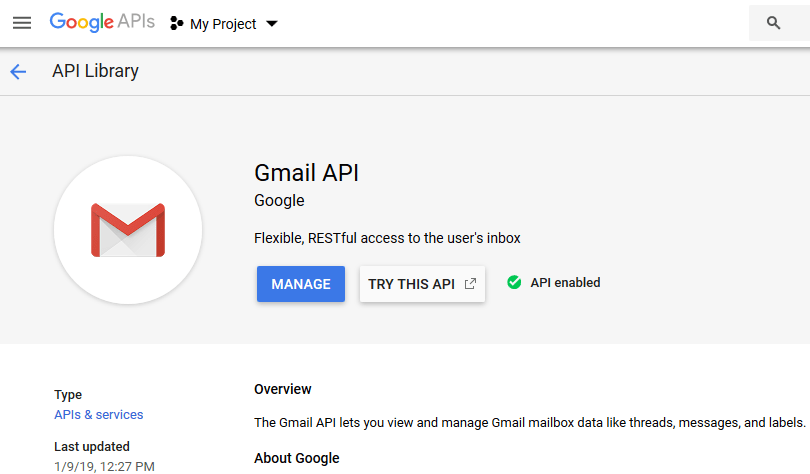
- In the Machine learning section, click Gmail API.
- If this is the first time you are working with API, you will see the blue Enable button. Otherwise, you will see blue Manage button.Click Enable (or Manage, depending on your scenario).
- Click Create Credentials in the upper right-hand corner.

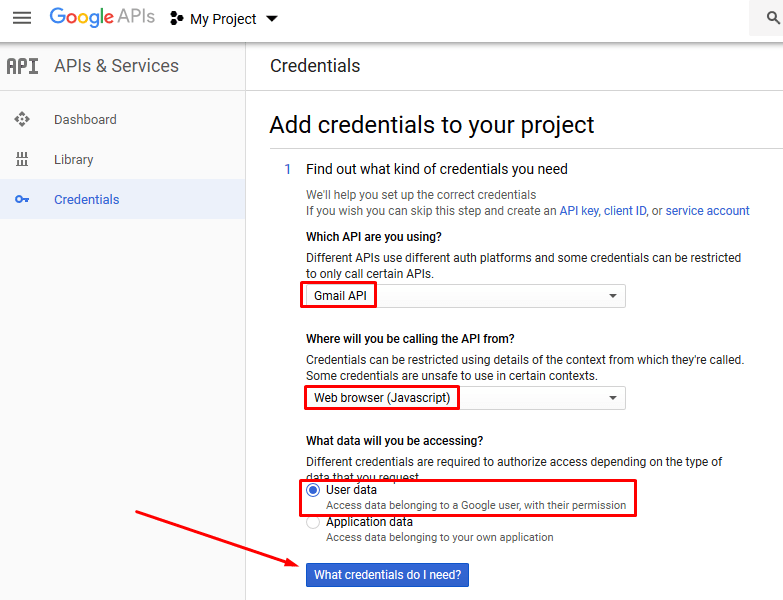
- Now you need to add credentials to your project. Select the options shown in the screenshot below and then click the blue What credentials do I need? button.
Which API are you using? Gmail API
Where will be you calling the API from? Web browser (Javascript)
What data will you be processing? User data
- You will see a pop window, click Set Up Consent Screen.
- On the OAuth consent screen tab, in the Application name box type WP-Mail-SMTP. Then click the Domain verification tab and click Add Domain. Enter your domain name (e.g. https://www.example.com) and click Add Domain.
- In the Verify ownership popup window, click Take Me There.
- Sign in to your Gmail account that you will be using for this Web site, click Add a Property, enter your site’s URL (e.g. https://www.example.com) and click Continue.
- Go through the process of verifying the domain. When you are done, you will go back to the Domain verification tab (see step #17 above) and add the URL for your domain one more time. This time you will see your domain added to the Domain verification tab.
- Click the OAuth consent screen tab and add your domain (e.g. example.com) in the Authorized domains box, your Web site home page link (e.g. https://www.example.com) and then click Save at the bottom of the page. If the Save button is grayed out, you probably didn’t add the home page link, or the Application name is incorrect.
- Click the Credentials tab. From the Create credentials drop-down button select OAuth client ID.
- You will find yourself on the Create OAuth client ID page. We will come back to this page shortly so keep this tab open.
- In the next step, you will need a URL, so let’s go back to the WordPress Dashboard -> Settings -> WP Mail SMTP and copy the following Authorized redirect URI. Make sure you replace my domain with your domain name.

- On the Create OAuth client ID page fill out the following information.
Application type: Web application
Name: WP-Mail-SMTP (Do not use a different name here)
Authorized JavaScript origins: https://www.example.com (replace example.com with your own domain name. Don’t use a wildcard or a path here, read the Restrictions section on this screen)
Authorized redirect URIs: https://www.example.com/blog/wp-admin/options-general.php?page=wp-mail-smtp&tab=auth (paste the URL you copied in step #5 above)
Click Create when done.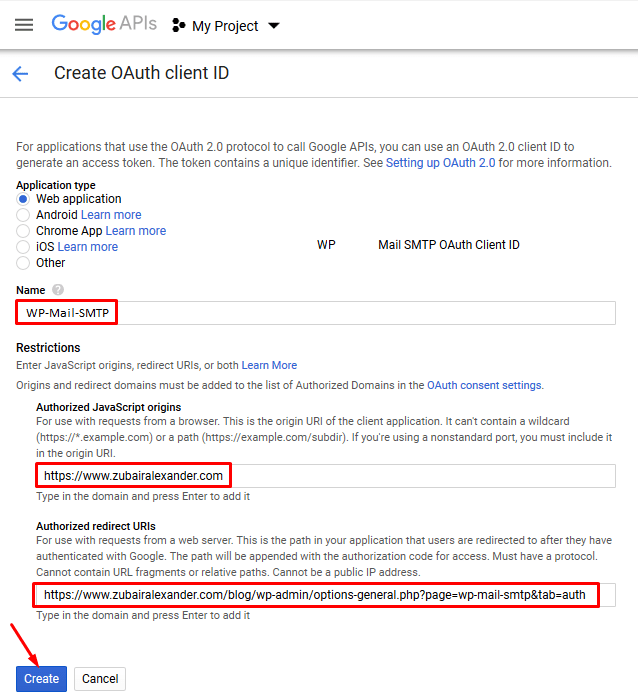
You may have to click Create twice, because the first time it will add the two URLs that you typed and the second time when you click Create, it will create the OAuth Client ID. - You will see the Client ID and the Client Secret that you need for your plugin. Copy and past them in the WP Mail SMTP plugin in WordPress Dashboard in the Gmail section (see the screenshot in step #27 if you need help), then click OK on this OAuth client popup window.
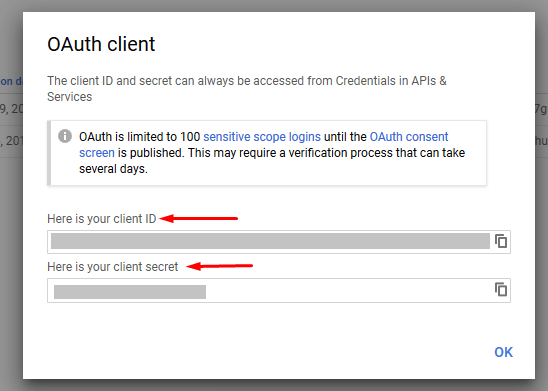
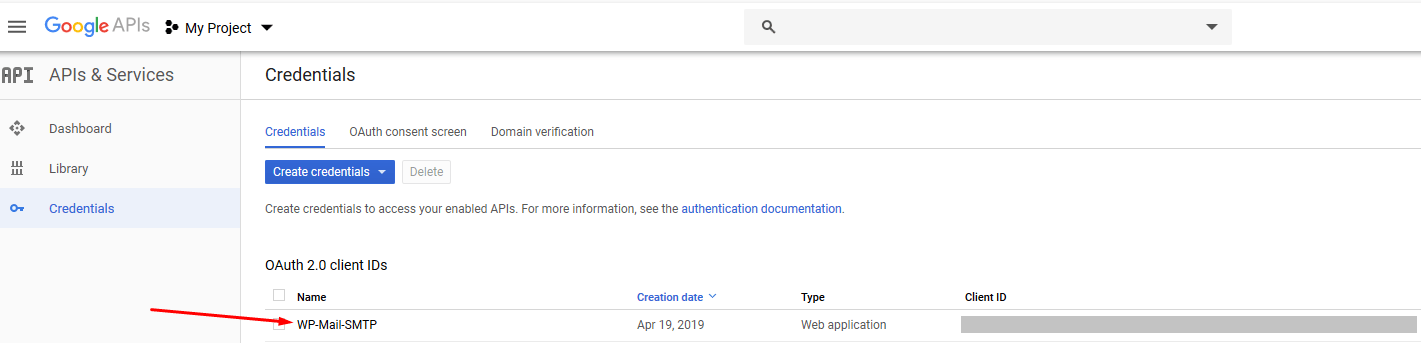
- When you click OK, you will see the new Client ID under Credentials. You can click the WP-Mail-SMTP link to view the client ID and client secret at the top of the page.
- This is the screen in the WordPress Dashboard in the WP Mail SMTP plugin where you will paste the Client ID and Client Secret in the Gmail section. Click Save Settings to continue.
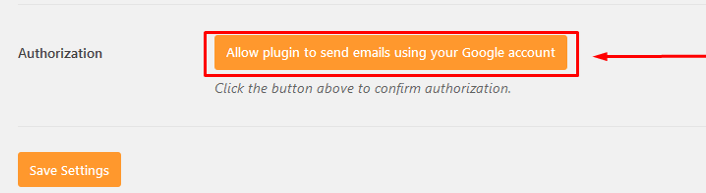
- After you click Save Settings, you will be able to authorize the plugin to use your Gmail account. Click Allow plugin to send emails using your Google account.
- You will be asked to log in to your Gmail account that you plan to use for this WordPress site. You will see a couple of screens asking your permissions to read, compose, send, and permanently delete all your email from Gmail. You should select Allow when prompted on both screens, or else your plugin won’t work. As soon as you link your site with your Google API, your configuration is complete.
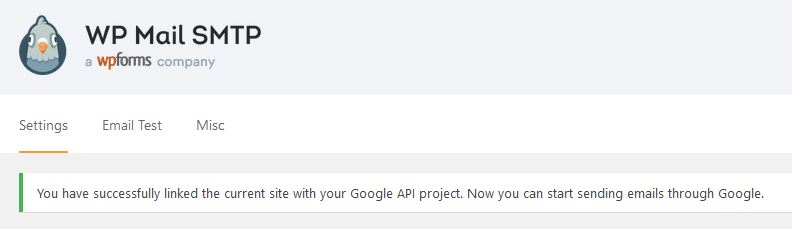
- Congrats! You have successfully linked the current site with your Google API project. You should test your site by entering a comment on a page or sending a message to yourself through a contact form to ensure that the WordPress site is now successfully sending messages to you. You can also use the Email Test tab in the plugin (see screenshot below).
Hopefully, you will find this article helpful in solving your WordPress email problem. I have found this plugin to be very reliable and better than other options that I have used in the past to configure email for my WordPress sites. Check it out. I am sure you will be impressed.
| Thanks for reading my article. If you are interested in IT training & consulting services, please reach out to me. Visit ZubairAlexander.com for information on my professional background. |
Copyright © 2019 SeattlePro Enterprises, LLC. All rights reserved.

