How to Configure MySite in SharePoint Server 2013

To properly configure MySite in SharePoint Server 2013, you need to take several steps. You also need to make sure that you meet the prerequisites before you get started. MySite is a personal site for an individual in an organization. It’s architecture consists of several pieces. MySite should be a dedicated Web application that includes a Site Collection based on MySite host site template. Each end user can have his/her own personal site (actually a Site Collection to be exact) within the top level Site Collection. In addition, there are several service applications and features involved. For information on planning for MySite, check out Plan for My Sites in SharePoint Server 2013 on Microsoft’s Web site.
Prerequisites
Before you get started, make sure that you have the following services properly configured.
- User Profile Service (UPS) application – MySite depends on UPS so ensuring UPS is properly configured will be a good idea.
- Managed Metadata service application – This service is required for MySite.
- Search Service application – This service is technically not required but highly recommended. Without search you won’t be able to locate information properly and therefore MySite functionality will be limited.
Step-by-Step Instructions
- Create a dedicated Web application for MySite. If your deployment of SharePoint somehow added MySite Site Collection to another Web application, delete it and create a new Site Collection in a new Web application that will be used only for MySite.
- Create the MySite Site Collection using the MySite host template. The steps for creating Web application and Site Collection are available here.
- Add a wildcard inclusion managed path to the Web application.
- Go to Central Administration, Application Management, Manage Web applications. Select the MySite Web application. Do not click on the hyperlink, simply click in a blank area to highlight it.
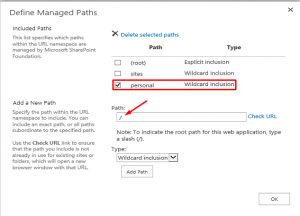
- Click Managed Paths on the ribbon.
- In the Include Paths section, select the box for sites or personal. I will select “personal” in my example.
- You can also add a new path such as My. This will make the URL for the MySite look like this http://mysites.domain.com/My/username. If you don’t want a path, you can also use a forward slash which will create the MySite for users at the root level under http://mysites.domain.com/.
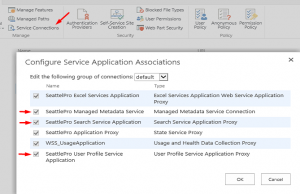
- On the ribbon, click Service Connections and make sure that Managed Metadata, Search Service, and User Profile Service applications are selected. If you configured these ahead of time then they should already be selected in the default group.
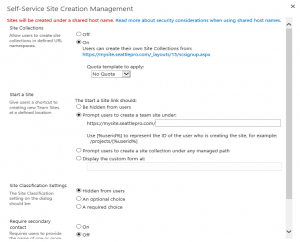
- Select Self-Service Site Creation on the ribbon.

- Make sure that the Site Collections option is set to On. Select an appropriate Start a Site option. I selected the option to “Prompt users to create a team site under.”
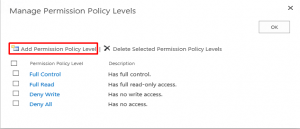
- On the ribbon click Permission Policy.

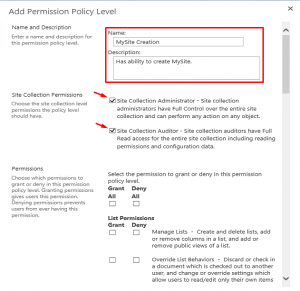
- Click Add Permission Policy Level.
- Give the permission level a name and a description. Optionally select the box Site Collection Administrator if you want the Site Collection Administrators to have full control of the My Site Site Collection.
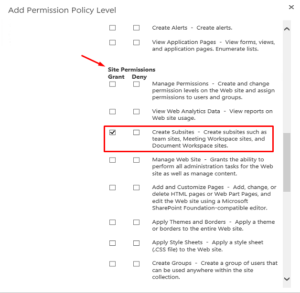
- Under Site Permissions select the box Create Subsites and click Save at the bottom of the screen.
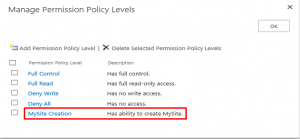
- The new Permission Level MySite Creation is added. Click OK.
- Select User Policy on the ribbon and then click Add Users.
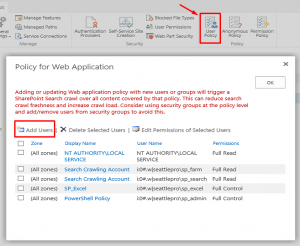
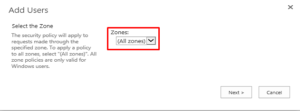
- Accept the All zones option and click Next.
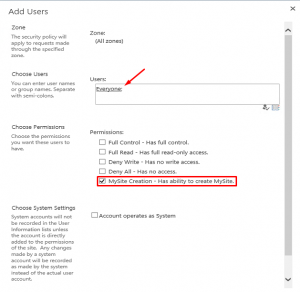
- Add Everyone in the Users box and check the box MySite Creation.
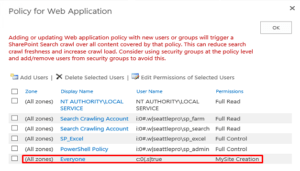
- The Everyone group is added to the Web application policy. Click OK.
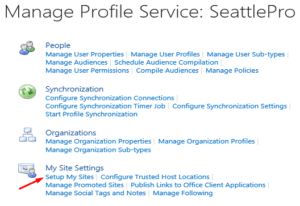
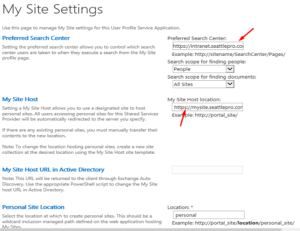
- I mentioned earlier that UPS application is required for MySite. Go to Central Administration -> Application Management -> Manage service applications and click on the User Profile Service application. Under My Site Settings click Setup My Sites.
- Enter the URL for your preferred Search Center. If your MySite requires SSL, add the letter “s” at the end of http in the URL. Notice my Personal Site Location is set to personal, which is the option I chose in step 7 as a managed path.
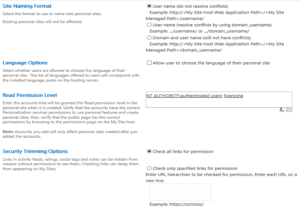
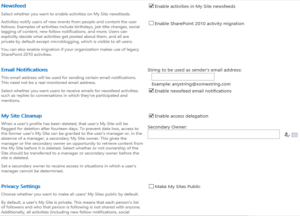
- Accept the default values for the remaining options.
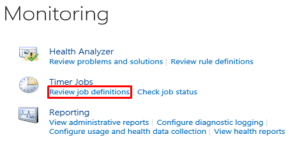
- In Central Administration go to Monitoring and under Timer Jobs section click Review job definitions.
- Locate the Activity Feed Job timer for the user Profile Service application.
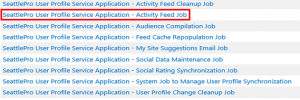
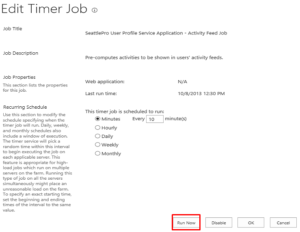
- The timer job should already be Enabled, if not, click Enable. Click Run Now. Do not modify the schedule. It is best to use the default recurring schedule unless you have a justifiable reason for modifying it and you fully understand the consequences.
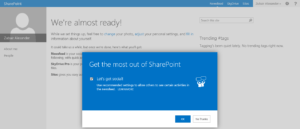
- To test your MySite. Go to a Web site, such as Intranet and click Sites in the header next to SkyDrive. Your new MySite will be created (be patient) and you will see a screen similar to the following. Click OK.
This completes the process of successfully creating, configuring and testing the MySite in SharePoint Server 2013.
Copyright ©2013 Zubair Alexander. All rights reserved.


