Best Practices for Setting up a New Library in SharePoint 2010

Here are some of the best practices that I recommend for setting up a new document library in SharePoint 2010. Depending on your environment and business policies, you may need to adjust some of these settings to fit your need. For example, the example for versioning shows an image with the option for major versions selected. However, you may be interested in both minor (draft) and major (published) versions in your environment. Use these settings as a guideline and modify them as necessary to fit your environment.
#1 – Delete the Default Shared Documents Library
Whenever you create a new site, delete the default Shared Documents library created by SharePoint because it contains a space in the name. Using spaces in the library name is not recommended because each space adds three extra characters (%20). Not only this makes it difficult to read the URL, it also makes the URL longer. If you go over the recommended URL length (256 characters), you will not be able to open the file and SharePoint will not give you any warnings as to why the file cannot be open. For more information check out my blog post Good Stuff to Know About SharePoint Files, Folders, URLs, Sites and the Like.
As a best practice, don’t use spaces when you create the following.
- Site
- List
- Library
- Page
- View (if you sent a hyperlink to a view in an e-mail it can potentially break the hyperlink so it’s best to avoid spaces, or to use underscore instead of a space to make it more readable)
#2 – Create a New Shared Document Library without a Space in the Name
- Create a new document library called, e.g. SharedDocs, without a space in the name.
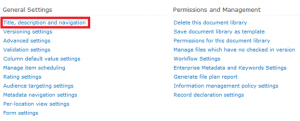
- After the library is created, rename the document library in Library Settings -> Title, description and navigation to Shared Documents. This makes the library more readable but keeps the name of the library in the URL as SharedDocs, which doesn’t contain a space.
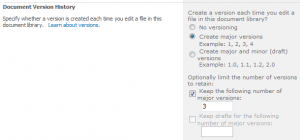
#3 – Enable Versioning
In the Library Settings, go to Versioning settings and select from one of the two options.
- Create major versions
OR - 2. Create major and minor (draft) versions
Limit the number of versions to retain to no more than 10. Five or less is ideal (I prefer 3 versions). If you select the option to create both major and minor versions then make sure you also limit the number of minor versions.
#4 – Require Documents to be Checked Out
Configure the option to require documents to be checked out before they can be edited.
#5 – Allow Management of Content Types
In the Library Settings, select the hyperlink for Advanced settings and set the option to Allow management of content types to Yes. You will only need this option if you are working with Content Types. By enabling this feature, the Content Types section is added to the Library Settings area.
#6 – Configure the Option for Opening Documents in the Browser
In the Library Settings, select the hyperlink for Advanced settings and configure the option for opening documents in the browser to Open in the client application.
#7 – Disable the Use of Folders in Libraries
By default, the option to create a folder is disabled in lists but not in the libraries. Folders are old way of organizing data and are discouraged in SharePoint because they make it difficult to organize and locate data.
In the Library Settings, select the hyperlink for Advanced settings and set the option to Make “New Folder” command available? to No.
#8 – Create a New Default View
Instead of modifying the default view, create your own custom default view.
- Go to the document library, e.g. Shared Documents, and on the Library tab select Create View.
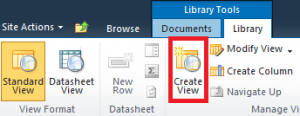
- In the Chose a view format section select Standard View.
- In the View Name box enter Default_View.
- Select the option to Make this the default view.
- Customize the columns that will be displayed.
NOTE: The Document ID column is only available if the feature has been enabled at the Site Collection level by the SharePoint administrator.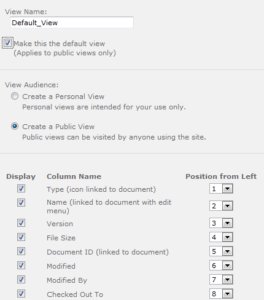
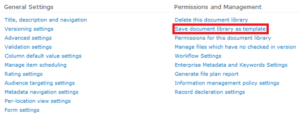
#9 – Save the Document Library as a Template
Save the document library as a template before you add any data. Name the template something like Document Library Template and let others know to use this library as a template when they create new document libraries.
Copyright ©2012 Zubair Alexander. All rights reserved.
